Pressure Washing for South Florida Properties
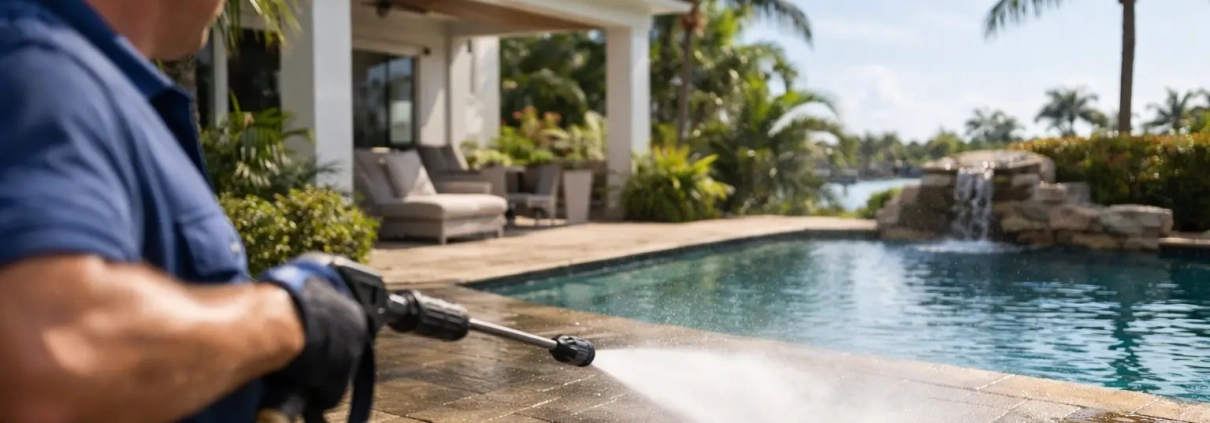
A clean driveway can change the way an entire property looks before anyone reaches the front door. In Palm Beach County, pressure washing is not simply a cosmetic service. Humidity, frequent rain, salt air, irrigation overspray, pollen, algae, mildew, and vehicle traffic leave exterior surfaces stained and slippery faster than many owners expect.
The right cleaning method restores that fresh, cared-for appearance without damaging the surface underneath. That distinction matters. A concrete driveway, paver patio, painted stucco wall, tile roof, wood deck, and multi-story building exterior all require different pressure, cleaning solutions, and access plans.
Why South Florida Exteriors Get Dirty So Quickly
South Florida’s climate creates ideal conditions for organic growth. Moisture settles into shaded areas, porous materials hold water, and warm temperatures allow algae and mildew to spread across concrete, pavers, walls, fences, and roof surfaces. A surface may look like it only has a few dark streaks, but those streaks can expand quickly after a stretch of wet weather.
Irrigation can add another layer of trouble. Water containing minerals may leave rust-colored stains on walls, sidewalks, curbs, and pool decks. Near the coast, salt particles can cling to exterior finishes and glass, dulling their appearance over time. Commercial properties also contend with gum, oil spots, loading-area grime, and the constant foot traffic that turns a clean walkway into a first-impression problem.
For homeowners, a dirty driveway or patio can make an otherwise well-maintained home feel neglected. For HOA boards, condominium managers, and business owners, the concern is larger: resident satisfaction, curb appeal, safety, and protecting exterior materials across a shared property.
Pressure Washing Is Not One Setting for Every Surface
The term pressure washing describes a process, not a single technique. High pressure can be highly effective on durable materials such as properly cured concrete, but it can scar, etch, strip, or loosen more delicate surfaces when used carelessly. Professional cleaning begins with identifying what is being cleaned and what caused the staining.
Concrete driveways and sidewalks often benefit from controlled pressure combined with the right pre-treatment. The goal is to remove embedded dirt and organic buildup evenly, rather than leaving visible wand marks or bright streaks across the surface. Pavers require additional attention because excessive force can disturb joint sand or expose weak areas. When pavers are already loose, cracked, or heavily worn, cleaning should be approached carefully and discussed before work begins.
Stucco, painted siding, screened enclosures, awnings, and exterior trim usually call for a lower-pressure approach. These surfaces can look dramatically better after cleaning, but forcing water into seams, vents, or damaged finishes creates avoidable risk. Roofs are another category entirely. Many roof materials should be cleaned with a soft-wash method that uses low pressure and appropriate cleaning solutions, not the aggressive pressure used on a driveway.
A qualified team should inspect for cracked grout, peeling paint, damaged screens, loose pavers, failed caulking, fragile landscaping, and areas where water must be directed away from doors, electrical components, and drainage-sensitive spaces. Cleaning is more effective when the preparation is as careful as the wash itself.
What a Professional Exterior Cleaning Visit Should Address
A dependable service should do more than make a surface look better for a day. It should account for the property’s materials, layout, traffic patterns, and nearby landscape. Before cleaning begins, the crew should clarify the work area and identify any problem stains that may need specialized treatment.
Oil stains, rust, tire marks, paint overspray, leaf tannins, and black algae do not respond the same way. Some improve significantly with the right treatment but may not disappear completely, especially when staining has been present for years or has penetrated a porous surface. Clear expectations are part of good service, not a limitation.
Landscaping also deserves attention. Plants should be protected, rinsed as appropriate, and monitored when cleaning solutions are used nearby. Pool areas need thoughtful runoff management, while commercial entrances may need work scheduled around customer traffic. For HOA and multifamily properties, communicating the cleaning schedule can reduce parking conflicts and prevent residents from walking through active work zones.
The visual difference is often immediate: brighter concrete, cleaner pavers, clearer edges along curbs, and exterior walls that look closer to their original color. The longer-term benefit is just as valuable. Regular cleaning helps property owners stay ahead of buildup before it becomes a bigger maintenance project.
Safer Access for Tall and Difficult Exteriors
Pressure washing becomes more complicated when the areas needing attention are several stories above ground. Traditional cleaning methods may require ladders, lifts, scaffolding, large work zones, and extended scheduling. Those options can be necessary in certain situations, but they can also create disruption for residents, tenants, customers, and building operations.
For high-rise buildings, condominiums, multi-story homes, and commercial properties, drone-powered exterior cleaning offers a practical alternative for appropriate surfaces. The Cleaners Drones uses aerial technology with eco-friendly, low-pressure cleaning methods to reach elevated exteriors without relying on scaffolding or lifts in many applications.
That approach can reduce ground-level congestion and limit the access challenges that come with tall structures. It is particularly useful for exterior walls and hard-to-reach building areas where a traditional crew would need extensive equipment to work safely. The method is not a substitute for every repair, inspection, or cleaning need, but it can be an efficient solution when the priority is exterior washing with less disruption.
Property managers should still consider access points, resident notices, parking arrangements, nearby pedestrian areas, and the condition of the exterior finish. A site-specific plan is always better than assuming one cleaning method fits every building.
How Often Should You Schedule Pressure Washing?
There is no universal schedule because exposure varies widely across South Florida properties. A shaded home with mature trees, a coastal condominium, a busy retail center, and a lightly used patio will accumulate grime at different rates. Many owners benefit from annual service, while high-traffic or heavily shaded areas may need attention more often.
Instead of waiting until the whole property looks dirty, watch for early signs. Dark or green growth on concrete, slippery walkways after rain, black streaks on exterior walls, dull pavers, and visible staining near irrigation heads are all reasons to schedule an evaluation. Addressing these conditions early is usually easier than removing deeply established buildup.
For commercial and multifamily properties, routine cleaning can be coordinated around operations. Walkways, entrances, dumpster pads, parking areas, breezeways, and common patios may be scheduled in sections to keep access open. The right timing protects the property’s appearance without creating unnecessary inconvenience for the people who use it every day.
Getting Better Results From Your Cleaning Service
Property owners can help make the job safer and more efficient by moving vehicles, patio furniture, planters, and loose items out of the work area before the crew arrives. Close windows, keep pets indoors, and let the cleaning team know about delicate plants, drainage concerns, exterior electrical features, or surfaces with existing damage.
It is also helpful to be specific about your priorities. If a rust stain near the entry, a slippery pool-deck section, or a stained storefront is the main concern, point it out before work starts. A professional can explain what treatment is appropriate, what results are realistic, and whether a lower-pressure or specialized approach is needed.
A clean exterior is one of the most visible forms of property maintenance. When pressure washing is matched to the surface, the stain, and the access challenge, it does more than remove dirt. It helps your home, community, or business look cared for from the moment someone arrives.
When Wood Floor Refinishing Is the Right Move
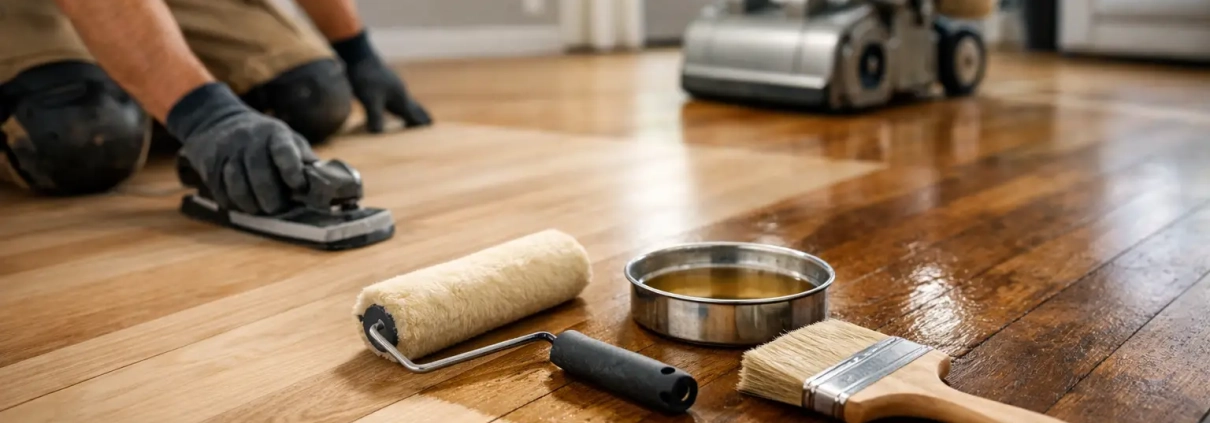
A hardwood floor can make a Palm Beach County home, condo, or commercial space feel finished and well cared for. But when the surface is dull, scratched, faded near windows, or showing dark water marks, routine cleaning will not bring it back. Wood floor refinishing removes the worn surface layer and creates a fresh protective finish, giving the room a visible reset without replacing the entire floor.
The right approach depends on what is underfoot. Some floors need a full sanding and refinishing process. Others may only need a lighter screen and recoat. And some damaged engineered floors are better served by repair or replacement. A professional evaluation prevents a costly mistake and helps protect the character and value of your property.
What Wood Floor Refinishing Actually Fixes
Refinishing addresses wear in the finish and, when sanding is appropriate, shallow damage in the wood itself. It is often the best option for solid hardwood floors that still have good structural integrity but no longer look their best.
Homeowners commonly call for help after years of foot traffic, pets, moving furniture, or sun exposure have left the floor uneven in color and sheen. In South Florida, humidity also plays a role. Wood naturally expands and contracts as moisture levels change. Entryways, sliding doors, kitchens, and areas near leaks can show wear sooner than the rest of the home.
A refinishing service may improve scratches, dullness, light stains, small dents, uneven color, and worn polyurethane. It can also remove an outdated amber-toned finish and replace it with a clearer, more current look. The result should not look artificially coated or overly glossy. It should look clean, protected, and appropriate for the wood species and the space.
Refinishing cannot solve every problem. Boards that are deeply warped, loose, heavily rotted, or stained by long-term water damage may need repair before any finish is applied. Dark black stains from moisture can sometimes be reduced, but they do not always disappear completely. Honest expectations matter, especially when a floor has a long history.
Is Wood Floor Refinishing Better Than Recoating?
This is one of the most useful distinctions for property owners. A recoat, sometimes called a screen and recoat, lightly abrades the existing finish and applies a new topcoat. It is less invasive than full refinishing and works well when the floor is simply losing its protective layer but the color and wood surface are still in good condition.
Full wood floor refinishing goes further. The existing finish is sanded down, usually along with a thin layer of wood, before stain and protective coating are applied. This gives you more control over scratches, color, and surface inconsistencies. It also creates a more dramatic transformation.
A recoat can be a smart maintenance decision for a lightly worn floor. It is usually faster, creates less disruption, and helps extend the time before a full sanding is needed. But it will not erase deep scratches, remove major stains, or correct a floor that has become uneven in color.
Full refinishing is the stronger choice when damage reaches beyond the finish. It is also the right time to consider a color change. The trade-off is greater preparation, more labor, and time for the finish to cure properly before rugs and furniture return.
Signs Your Floor Is Ready for Refinishing
Waiting until the floor is severely damaged can make restoration more complicated. Watch for these clear signs that the finish is no longer doing its job:
- Scratches are widespread and visible from across the room, not just in isolated spots.
- The floor looks gray, cloudy, or dull even after professional cleaning.
- Water no longer beads on the surface and instead darkens or soaks into the wood.
- High-traffic paths, doorways, and sunny areas look noticeably lighter or more worn.
- The finish is peeling, flaking, or separating around board edges.
A simple water-bead test can offer an early clue. Place a few drops of water on a clean area of the floor. If the water stays beaded, the finish may still be protecting the wood. If it quickly absorbs and darkens the surface, the floor may need professional attention. This is not a complete diagnosis, but it is a useful reason to schedule an inspection.
The Refinishing Process for a Cleaner Result
A quality result begins before the sanding equipment is turned on. The room must be cleared, and the floor should be assessed for loose boards, exposed nails, damaged transitions, old waxes, and previous coatings. Some products can interfere with adhesion, which is why using household polish or wax on a wood floor can create problems later.
Preparation and surface repairs
Minor gaps, nail holes, and damaged boards may be addressed before refinishing begins. Floor protection and dust-control measures are especially important in occupied homes, condos, and business spaces. While no sanding project is completely dust-free, professional containment and cleanup make a meaningful difference for the rest of the property.
For condominium residents and property managers, planning is equally important. Confirm building rules, elevator access, permitted work hours, and any requirements for protecting common areas. A well-organized project reduces disruption for neighbors and keeps the work moving on schedule.
Sanding, staining, and finishing
The sanding stage removes the old finish and levels surface wear. The goal is not to remove more wood than necessary. Skilled refinishing uses the correct sequence of abrasives to create a smooth, even surface without leaving swirl marks or sanding lines.
After the floor is prepared, stain may be applied if the property owner wants to adjust the color. Natural finishes remain popular because they keep the original grain visible and often make rooms feel brighter. Dark stains can look striking, but they may show dust, scratches, and pet hair more readily. Medium tones are often a practical balance for active households and rental properties.
The final protective coat has a major effect on appearance and maintenance. Matte and satin finishes hide everyday marks better than high gloss, which reflects more light but can reveal scratches and footprints. For many South Florida homes, a durable low-sheen finish offers the clean look people want with less day-to-day frustration.
Curing time is not optional
A floor can feel dry before it is fully cured. Light foot traffic may be allowed after a short period, depending on the finish, but furniture, area rugs, and heavy use should wait until the coating has hardened as recommended. Rushing this stage can leave impressions, reduce durability, or cause rugs to stick to the finish.
Can Every Wood Floor Be Refinished?
Solid hardwood can usually be refinished several times over its life, provided enough wood remains above the tongue-and-groove joint. Engineered wood is different. It has a real wood veneer over a layered base, and that veneer varies in thickness. Some engineered floors can be lightly sanded once or more, while others are too thin for traditional refinishing.
Laminate and luxury vinyl plank are not wood floors and cannot be refinished in the same way. Their printed or factory-wear layers cannot be sanded without damage. This is why identifying the floor material before making a decision is essential.
Older floors deserve special care as well. They may have beautiful grain and can often be restored impressively, but repairs, moisture issues, and previous refinishing work need to be considered first. The best recommendation is not always the biggest project. It is the one that protects the floor for the longest practical period.
Keeping a Refinished Floor Looking Its Best
Once the floor is restored, simple habits help preserve it. Use felt pads under furniture, place mats at exterior doors, clean spills quickly, and avoid soaking the floor with water. Sweep or vacuum with a hard-floor setting regularly so grit does not act like sandpaper under shoes.
Choose cleaning products made specifically for the floor’s finish, and skip steam mops, oil soaps, waxes, and harsh all-purpose chemicals unless the finish manufacturer specifically approves them. In humid months, consistent indoor climate control can also help limit excessive movement in the wood.
The Cleaners Drones approaches floor restoration with the same practical focus used across South Florida properties: assess the material, protect the space, and deliver a result you can see. When wear starts to distract from an otherwise well-kept room, a timely professional assessment can keep a beautiful wood floor in service for years to come.
Tile Grout Color Sealing Restores Worn Floors
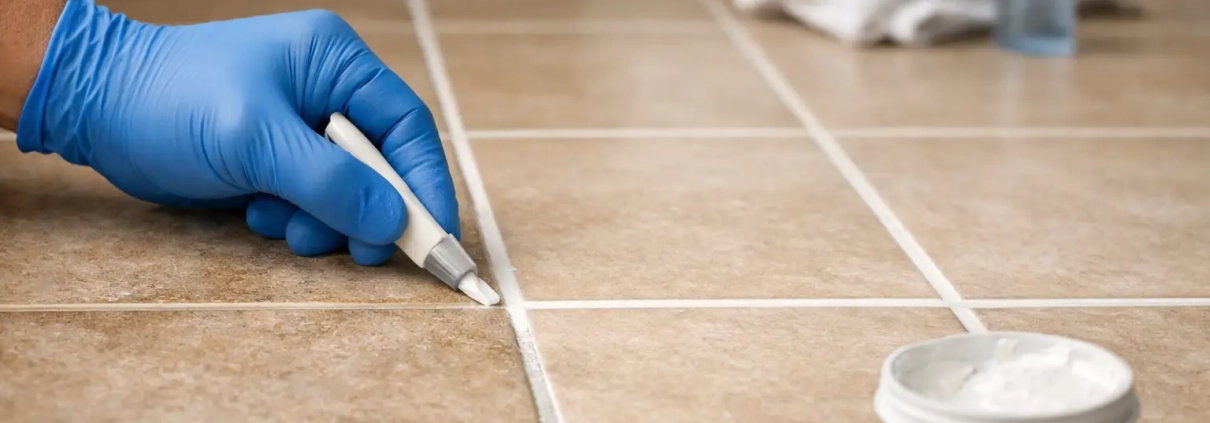
A tile floor can be freshly mopped and still look dirty when the grout lines are dark, blotchy, or permanently stained. Tile grout color sealing addresses that problem at its source, restoring a consistent grout color while creating a protective finish that makes future cleanup easier. For South Florida homes, condos, restaurants, and common areas, it can dramatically improve the appearance of a room without the cost and disruption of replacing tile.
What Tile Grout Color Sealing Actually Does
Grout is porous. Over time, it absorbs soil, spills, cleaning residues, oils, soap film, and moisture. In kitchens, that often means dark paths in front of the sink, range, and refrigerator. In showers and bathrooms, the issue can be mildew staining, mineral buildup, and discoloration around the perimeter of the room. High-traffic condo corridors and commercial entryways collect a different mix of dirt and moisture, but the visual result is much the same: tile that looks worn well before the tile itself has reached the end of its life.
Color sealing is not simply applying a clear sealer over the existing grout. A professional-grade grout color seal is a pigmented coating designed to bond to cleaned grout lines. It covers stubborn discoloration, evens out inconsistent color, and adds a protective barrier over the grout surface.
The difference is visible right away. Instead of highlighting every darkened grout line, the floor has a uniform, maintained appearance. Because the sealer limits absorption at the surface, routine cleaning is less likely to drive soil deeper into the grout.
Why Clear Sealer Is Not Always Enough
Clear penetrating sealers can be useful on new or lightly used grout. They help reduce absorption while preserving the grout’s original appearance. But they cannot hide an existing stain, correct faded sections, or make mismatched repair areas blend in.
Tile grout color sealing is the better option when the grout is structurally sound but no longer looks clean after professional cleaning. It is especially effective when grout has uneven coloring from years of traffic, harsh cleaners, previous spot treatments, or grout repairs that do not match the original installation.
That said, color sealing is not a fix for every grout problem. Cracked, loose, crumbling, or missing grout should be repaired before sealing. Grout lines that repeatedly crack may point to tile movement, a subfloor issue, or an expansion-joint problem. Covering that damage with color seal will not make the underlying issue disappear.
The Visible Benefits for South Florida Properties
South Florida floors work hard. Sand, rainwater, humidity, pool traffic, pets, and frequent entertaining can quickly dull grout in both residential and commercial settings. A color-sealed floor is easier to keep presentable, which matters when a property needs to make a strong first impression.
For homeowners, the benefit is often a kitchen, bathroom, or living area that looks cleaner without a renovation project. For HOA boards and property managers, restored tile and grout can improve common-area appearance while avoiding the noise, mess, and downtime associated with tile replacement. Business owners can refresh restrooms, dining areas, lobbies, and entryways with far less disruption than a new flooring installation.
Color sealing can also create a more intentional design. A light grout color can brighten a space, while a medium gray or taupe can offer a practical, modern look that hides day-to-day traffic better. The right choice depends on the tile, the room, lighting, and the amount of use the floor receives.
How the Tile Grout Color Sealing Process Works
The quality of the preparation determines the quality of the finished result. Applying a color seal over dirty grout, soap residue, or a failing previous coating can leave uneven adhesion and shorten the life of the treatment.
A professional process begins with an inspection of the tile, grout condition, traffic patterns, and any problem areas. This helps identify cracked grout, loose tile, efflorescence, heavy mineral deposits, and old topical products that may need special attention. The technician should also confirm that the tile itself is compatible with the cleaning method and color seal being used.
Next comes deep cleaning. Professional equipment and grout-specific cleaning solutions lift embedded soil from the grout lines and tile surface. In bathrooms and showers, this may include addressing soap film, mildew staining, and mineral buildup. In kitchens, the focus is often oils and tracked-in soil. The floor is then thoroughly rinsed and allowed to dry as needed.
Once the grout is clean and stable, the color seal is applied carefully to the grout lines. Excess material is removed from the face of the tile before it dries. This step requires patience and close attention, particularly with textured tile, narrow joints, natural stone, or tile that has a matte finish.
After curing, the grout should have a consistent color and a more protected surface. A skilled technician will review the finished area for missed spots, uneven coverage, or residue before returning the space to normal use.
When Color Sealing Is a Good Fit
Color sealing is often a smart choice for ceramic or porcelain tile with cement-based grout in kitchens, bathrooms, foyers, laundry rooms, and common areas. It is particularly valuable when the tile is in good condition but the grout makes the entire surface look aged.
Before moving ahead, consider four practical factors:
- The grout should be intact, firmly bonded, and free of persistent cracking.
- Moisture problems should be corrected first, especially around showers, toilets, exterior doors, or slab areas.
- Natural stone, unglazed tile, and very textured surfaces require material-specific testing and care.
- The selected grout color should work with the room’s lighting, tile pattern, and expected traffic.
Shower walls deserve special attention. Color sealing can improve the appearance and cleanability of grout, but it is not a substitute for correcting failed caulk, leaking plumbing, damaged waterproofing, or chronic moisture behind the tile. A reliable assessment should distinguish a cosmetic grout issue from a water-management issue.
Choosing the Right Grout Color
Matching the original grout color is a common choice, especially when the goal is to make the floor look newly cleaned rather than redesigned. A close match preserves the existing tile pattern and can make repairs disappear into the surrounding grout.
A color change can be equally effective. Light grout can make a room feel brighter but may show dirt faster in busy entryways or homes with pets. Darker grout offers contrast and can be more forgiving in high-traffic locations, though it may make a small room feel more defined or visually busy. Mid-tone gray, beige, and taupe shades are often practical choices for Palm Beach County properties because they balance a clean appearance with everyday wear.
A small test area is worthwhile whenever possible. Grout color can look different once it dries and can shift depending on daylight, interior lighting, and the surrounding tile.
Keeping Color-Sealed Grout Looking Its Best
Color sealing reduces maintenance, but it does not eliminate it. Regular sweeping or vacuuming prevents gritty sand from wearing on the floor. For mopping, use a neutral cleaner recommended for tile and grout, rather than bleach-heavy products, acids, or harsh abrasive powders that can dull the finish over time.
Wipe spills promptly, especially cooking oils, hair dye, cosmetics, wine, and pet accidents. In showers, reducing standing water and using proper ventilation helps limit soap residue and moisture-related staining. Avoid steam cleaning or aggressive scrubbing until you have confirmed that the method is appropriate for the specific grout coating and tile.
A professional maintenance plan may be useful for large common areas, restaurants, and rental properties where floors receive constant use. Routine cleaning helps preserve the finish and makes it easier to spot grout repairs or moisture issues before they become larger problems.
Why Professional Application Matters
DIY grout color products can seem straightforward, but the work is detail-sensitive. Uneven preparation, the wrong product, poor color selection, or seal residue left on tile can create a result that is difficult to correct. This is not just a matter of making grout look darker or lighter. It requires matching cleaning methods and coatings to the specific tile, grout, and condition of the surface.
The Cleaners Drones approaches tile and grout restoration with the same focus used across residential and commercial cleaning: identify the surface, clean it thoroughly, and choose a process that delivers a visible, durable improvement. That matters in a home where every room should feel cared for, and in a managed property where appearance affects residents, guests, and tenants every day.
When tile is worth keeping but grout is holding the room back, color sealing offers a practical middle ground between repeated scrubbing and full replacement. Start with an honest inspection, address any repairs or moisture concerns first, and let the condition of the floor guide the right solution.