Emergency Water Extraction Service Steps
A burst supply line behind a vanity can release far more water than most homeowners expect. By the time water reaches a hallway, baseboards, cabinets, and flooring may already be absorbing moisture. An emergency water extraction service is designed for this moment: remove standing water quickly, identify where it traveled, and begin drying before a small leak becomes a major restoration project.
For Palm Beach County homes, condos, and commercial properties, fast action matters especially because humidity slows natural drying. Opening windows or aiming a household fan at wet flooring may feel helpful, but it rarely addresses the moisture trapped beneath surfaces or inside walls. The goal is not simply to make the floor look dry. It is to return affected materials to an appropriate moisture level safely and thoroughly.
Start With Safety and Stop the Water Source
If water is actively flowing, shut off the nearest fixture valve or the property’s main water supply if it is safe to do so. A leaking refrigerator line, toilet supply line, washing machine hose, or water heater can keep adding damage by the minute. For a roof or window leak during heavy rain, move valuables away from the area and contain water only if doing so does not create a slip or electrical hazard.
Do not walk through standing water near outlets, cords, appliances, or an electrical panel. Turn off power to the affected area only when it is safe and you know which breaker controls it. If water has reached electrical equipment, call a qualified electrician as needed before anyone begins work.
The type of water also changes the response. Clean water from a broken supply line is different from water involving a toilet overflow, sewage backup, or exterior floodwater. Contaminated water requires protective procedures and careful removal of affected materials. Do not try to shop-vac sewage or floodwater without the right equipment and training.
What an Emergency Water Extraction Service Does
Water damage restoration has a sequence. Skipping steps can leave moisture behind, creating odors, warping, staining, and conditions that may support mold growth. A professional response begins with an assessment of the source, the category of water, and the rooms or building components affected.
Extraction Comes Before Drying
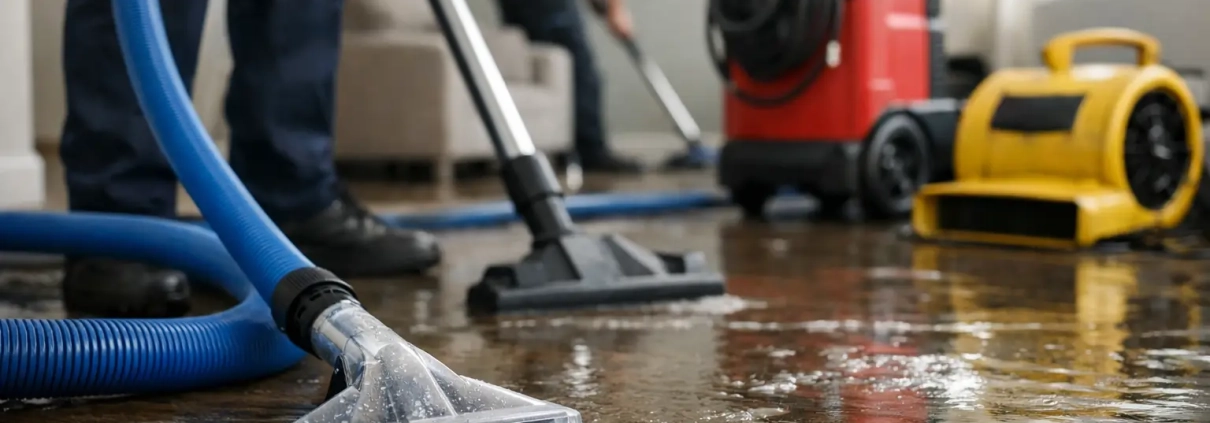
The first priority is removing standing water. Professional extraction equipment can pull water from carpet, padding, hard surfaces, and other accessible areas much more effectively than towels or a small wet vacuum. The faster water is removed, the less time it has to soak through flooring, under baseboards, and into lower wall sections.
Carpet can sometimes be saved after a clean-water event, depending on how long it was wet, the amount of water involved, and the condition of the padding and subfloor. In other cases, saturated padding must be removed because it holds moisture and can prevent the structure below from drying properly. A reliable technician should explain the recommendation rather than treating every water loss the same way.
Moisture Detection Finds What You Cannot See
Standing water is only part of the problem. Water follows gravity, slips beneath flooring, wicks into drywall, and travels through shared walls in condominiums and multi-unit buildings. Moisture meters and thermal imaging help identify affected areas without unnecessary demolition.
This step matters in South Florida condos, where water can move between units and impact neighboring ceilings, wall cavities, and common areas. Property managers and HOA boards need a clear picture of the extent of damage quickly so they can coordinate access, notify residents, and protect the building.
Controlled Drying Protects Materials
After extraction, technicians place commercial air movers and dehumidifiers to remove remaining moisture from materials and the air. Equipment placement is based on the affected materials and the size of the loss, not just the room’s square footage. Wood flooring, engineered flooring, drywall, cabinets, carpet, and concrete each respond differently to moisture.
Daily or scheduled monitoring is part of a proper drying plan. Technicians check moisture readings, adjust equipment, and document progress until the area reaches drying goals. Removing equipment too early can leave hidden moisture behind. Running it longer than necessary can add inconvenience and energy use, so measurement is what keeps the process focused.
The First Hours Make a Difference
Water damage does not always look dramatic at first. A small amount of water under vinyl plank flooring or inside a cabinet toe-kick can create problems days later. Prompt extraction reduces the chance that materials will swell, separate, or require replacement.
Move lightweight furniture, rugs, electronics, paper items, and fabric belongings away from the affected area if it is safe. Place foil or protective blocks under furniture legs that cannot be moved, and avoid placing wet items on dry carpet or upholstered furniture. Take photos of visible damage for your records before major cleanup begins.
Avoid these common mistakes:
- Do not use a household vacuum to remove water.
- Do not lift wall-to-wall carpet if you are unsure how to handle it or if contamination is possible.
- Do not assume a dry surface means the subfloor or wall is dry.
- Do not run ceiling fans or HVAC systems if contaminated water may have affected the area.
- Do not delay because the leak appears minor or has stopped.
For commercial spaces, quick containment also helps preserve operations. A water event in an office, retail space, fitness center, or lobby may require isolating a small area, protecting equipment, and creating a drying plan around tenants, customers, and staff. The right approach balances speed with a clean, organized work area.
When Water Damage Requires More Than Extraction
Extraction is the urgent first service, but it is not always the final one. Materials may need cleaning, sanitizing, repair, or replacement based on the water source and the time they remained wet. Drywall that has absorbed contaminated water, for example, may need to be removed. Cabinet components, baseboards, insulation, and flooring can require separate decisions after moisture readings and condition checks.
Mold is another reason not to treat water damage as a cosmetic issue. Mold can begin to grow when moisture remains in building materials, though the risk and required response depend on conditions at the property. Fast extraction and verified drying are practical prevention steps. If visible growth is present or moisture has persisted, the scope of work may need to expand beyond standard water removal.
Insurance is also a case-by-case matter. Coverage often depends on the cause of loss, policy language, maintenance history, and whether the water came from inside or outside the property. Keep photos, invoices, and communication records. A professional restoration team can provide documentation of observed damage, extraction work, equipment placement, and drying progress, but your insurer makes the coverage decision.
Water Extraction for Condos and South Florida Properties
In a condo or high-rise, a leak in one unit can become a building-wide coordination issue. Water may travel downward into ceilings, along plumbing penetrations, or across shared structural areas. Residents should notify building management promptly, while managers should document the event, coordinate unit access, and confirm whether adjacent spaces need moisture inspection.
For single-family homes, common causes include failed appliance hoses, air conditioner condensate line issues, plumbing leaks, roof intrusion, and water heater failures. South Florida’s intense rain events add another variable. Exterior water intrusion may need a different plan than a clean indoor plumbing leak, particularly when stormwater or floodwater is involved.
The Cleaners Drones approaches water damage with the same focus that guides every property service: clear communication, careful work, and visible progress. The immediate objective is to protect the property, limit disruption, and give the owner or manager a straightforward understanding of what happens next.
Call Before the Damage Spreads
If water is standing, spreading, or has reached flooring, walls, cabinets, or neighboring units, treat it as a time-sensitive property issue. Shut off the source when safe, protect people and valuables, and arrange professional assessment and extraction as soon as possible.
A fast, measured response can be the difference between drying a contained area and replacing materials that had a chance to stay wet. When the water is under control, the next best step is simple: make sure the moisture you cannot see is being checked just as carefully as the water you can.
Water Damage Restoration Steps That Protect Property
A washing machine hose fails behind the wall, a water heater leaks overnight, or wind-driven rain finds one weak point in a roof. The visible puddle is only part of the problem. Effective water damage restoration addresses the moisture you can see and the moisture already moving through flooring, drywall, insulation, cabinets, and framing.
For Palm Beach County homeowners, condo boards, property managers, and business owners, speed matters. South Florida humidity can slow natural drying, while air conditioning systems and enclosed spaces can hide damp materials long after the surface looks clean. The right response protects the building, limits interruption, and gives you a clear picture of what needs to happen next.
The First Hours Matter Most
Start by protecting people and stopping the source of water if it is safe to do so. Shut off the local supply valve or main water line for a plumbing leak. If water is near electrical outlets, appliances, or a breaker panel, stay clear and contact a qualified professional. Never enter standing water where electricity may be present.
Move dry, valuable items away from the affected area when possible. Furniture, documents, electronics, inventory, and area rugs can often be protected if they are removed early. Avoid walking water from one room to another, especially over carpet or wood flooring.
Then document the damage. Take photos and videos before removing materials or beginning cleanup. This record can help with insurance communication and gives the restoration team a useful baseline. If the loss is significant, notify your insurance carrier promptly, but do not wait for an adjuster before taking reasonable steps to prevent further damage.
What Professional Water Damage Restoration Includes
Restoration is not simply putting fans in a wet room. A professional process begins with inspection and moisture detection. Water may travel under vinyl plank flooring, wick upward into drywall, collect beneath cabinets, or soak insulation behind a wall. Moisture meters, thermal imaging, and hygrometers help identify where drying is needed.
1. Inspection and a Clear Scope of Work
The first question is where the water came from. A clean supply-line leak is handled differently from a toilet overflow, stormwater intrusion, or sewage backup. The category of water affects what can be safely cleaned, what must be removed, and the protective procedures required.
The restoration team should identify affected materials, take moisture readings, and explain the plan in practical terms. That includes which areas can likely be dried in place, which materials may need removal, how equipment will be positioned, and what access is required from residents or staff.
2. Water Extraction and Controlled Removal
Removing bulk water quickly reduces the amount that can absorb into surrounding materials. Professional extractors pull water from carpet, padding, hard surfaces, and low areas that mops cannot adequately address.
Some materials do not recover well after prolonged saturation. Carpet padding, swollen particleboard cabinets, wet insulation, and severely damaged drywall may need removal to allow the structure behind them to dry. It can feel frustrating to remove materials that appear mostly intact, but leaving wet layers trapped in place can create a larger repair later.
3. Structural Drying, Not Surface Drying
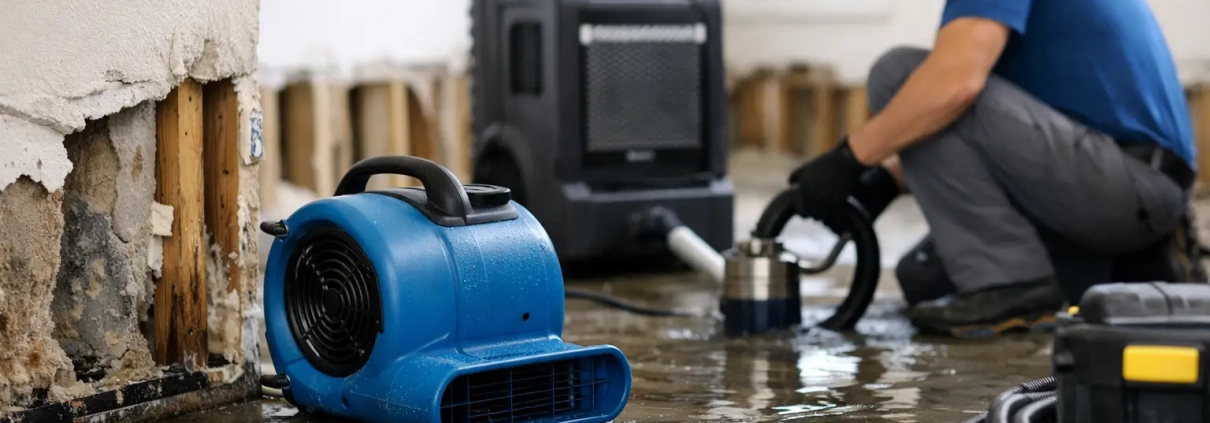
Air movers and dehumidifiers work together to move moisture out of materials and capture it from the air. The equipment setup depends on the size of the affected area, the building materials, the amount of water, and the indoor conditions.
In South Florida, opening windows is not always helpful. Outdoor humidity can introduce more moisture into the property and make drying equipment less effective. Controlled drying with the right equipment is usually a better approach than relying on ceiling fans, open doors, or a household dehumidifier alone.
4. Monitoring Until Moisture Levels Return to Normal
Drying is measured, not guessed. A restoration team should revisit the property, adjust equipment when needed, and compare readings to dry materials in unaffected areas. Floors and walls can look normal while still holding moisture that may lead to odors, warping, or microbial growth.
Once readings indicate the area is dry, equipment can be removed and repairs can move forward. This documentation also provides valuable support for property managers, HOAs, and insurance files.
Why Mold Prevention Is Part of the Job
Mold does not require a dramatic flood. A slow plumbing leak beneath a vanity, moisture behind a refrigerator line, or wet drywall after a roof leak can create the conditions mold needs. The risk increases when materials remain damp for more than a day or two.
Fast extraction and drying are the first line of defense. If visible growth, strong musty odors, or widespread contamination is present, the work may require containment and more specialized remediation procedures. The correct response depends on the source of water, the materials involved, and how long they have been wet.
Do not cover odors with fragrance, paint over staining, or reinstall baseboards before moisture levels are confirmed. Those shortcuts can conceal a problem without solving it.
When DIY Cleanup Is Enough and When It Is Not
A small spill on a sealed tile floor may only need towels and quick drying. If the water is clean, contained, and removed immediately, a homeowner can often manage the situation.
Professional help is the safer choice when water has entered carpet, wood flooring, drywall, cabinets, insulation, or multiple rooms. The same applies to sewage, water from a toilet overflow, stormwater, recurring leaks, visible mold, or water that has been standing for an unknown amount of time. Commercial properties and multifamily buildings also need a coordinated response because water can travel between units, suites, floors, and shared building systems.
There is a trade-off to consider. Calling a restoration company may feel like a bigger step for a small incident, but fast assessment can prevent a minor leak from becoming flooring replacement, cabinet repairs, mold work, or tenant disruption. The goal is not to remove materials unnecessarily. It is to make informed decisions before hidden moisture has time to spread.
Water Damage in Condos and Commercial Properties
Condominiums create a unique set of questions. Is the leak coming from an upstairs unit, a common plumbing stack, a roof, or inside the affected unit? Who is responsible for access, mitigation, and repairs? Quick documentation and communication help prevent delays while responsibility is being determined.
For property managers and commercial operators, restoration should protect continuity as much as possible. Equipment may need to be placed safely around residents, customers, or employees. Work areas may require clear signage, scheduled access, and daily updates. A dependable team understands that drying a space is only one part of protecting the property.
The Cleaners Drones serves Palm Beach County with practical water damage response focused on detailed inspection, controlled drying, and clear communication. Whether the affected space is a home, condo unit, office, or common area, the priority is to reduce damage before it expands.
Questions Property Owners Often Ask
Can I stay in the property while drying equipment is running?
Often, yes. It depends on the size of the affected area, the type of water involved, electrical safety, noise tolerance, and whether any materials must be removed. For a business or occupied condo, the restoration plan should account for safe access and daily operations whenever possible.
How long does water damage restoration take?
Drying commonly takes several days, but no two losses are identical. A small, clean water event addressed quickly may dry faster. Water trapped under flooring, inside walls, or beneath cabinets can extend the timeline. Repairs after drying, such as drywall, flooring, paint, or cabinet work, take additional time.
Will insurance cover the work?
Coverage depends on the policy and the cause of loss. Sudden accidental plumbing leaks are often handled differently from long-term seepage, maintenance issues, or floodwater. Keep records, photographs, invoices, and moisture documentation, and speak directly with your insurer about your policy.
A leak does not have to become a major restoration project. Acting quickly, drying with purpose, and confirming the property is truly dry gives you the best chance to protect the space you have worked hard to maintain.
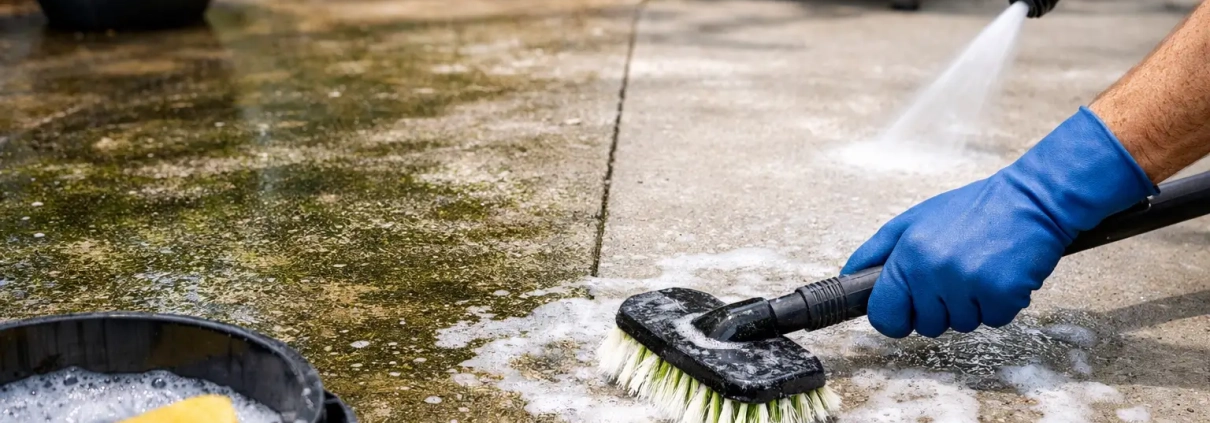
How to Remove Mildew From Patio Concrete
That dark green or black film on a patio is more than an appearance problem. In Palm Beach County, warm temperatures, humidity, shade, and frequent rain can allow mildew, algae, and organic buildup to return quickly. Knowing how to remove mildew from patio concrete correctly helps restore the clean, bright surface you want without damaging the concrete, surrounding plants, or nearby finishes.
For a small, recent patch, a careful DIY cleaning can work well. For widespread buildup, slippery surfaces, pavers near a pool, or stains that keep returning, the method matters just as much as the cleaner. Concrete is durable, but it is not indestructible. Aggressive pressure, the wrong chemical concentration, or poor rinsing can leave behind etched areas, streaking, or runoff problems.
Why Patio Concrete Gets Mildew in South Florida
Mildew needs moisture and organic material to grow. Patio concrete provides a textured, porous surface where pollen, leaf debris, dirt, and moisture can settle. Areas beneath trees, beside privacy walls, behind furniture, and near sprinklers usually develop growth first because they dry more slowly.
What looks like mildew may also be algae, particularly when the stain is green and feels slick underfoot. Black spotting can be mildew, mold, embedded grime, or staining from leaves and irrigation. The distinction does not always change the cleaning approach, but it does explain why a patio can become hazardous before it looks severely dirty.
Regular sweeping and drainage make a real difference. If water repeatedly pools along an edge or downspout, cleaning alone will not be a long-term fix. The surface will likely grow dark again until the moisture source is addressed.
What You Need Before You Clean
Start on a dry day with enough time for the patio to be fully rinsed and air out. Move furniture, planters, rugs, toys, and grills off the concrete. Sweep away loose leaves and sand so the cleaning solution can reach the buildup instead of getting diluted by debris.
For most small residential areas, gather a stiff nylon push broom or deck brush, a bucket, a garden hose with a spray nozzle, gloves, eye protection, and a cleaner suitable for exterior concrete. A nylon brush is the safer choice. Wire brushes can leave metal fragments behind that later rust on the concrete.
Protect the edges of the work area before applying any solution. Wet nearby grass and plants with plain water, cover sensitive landscaping when practical, and keep pets and children away until the patio has been thoroughly rinsed and dried. Never mix cleaning chemicals. In particular, bleach should never be combined with ammonia, acids, or other household cleaners.
How to Remove Mildew From Patio Concrete Safely
Begin by testing your chosen cleaner in a small, less visible spot. This is especially useful on colored concrete, decorative coatings, stamped finishes, or concrete close to painted walls. Follow the product label rather than assuming that a stronger mix will give a better result.
Apply the solution evenly to a manageable section of patio. Let it sit only for the recommended dwell time. The goal is to loosen and kill surface growth, not allow chemical to dry into the concrete. In South Florida sun, solutions can dry faster than expected, so work in smaller sections or choose a cooler part of the day.
Scrub the treated area with a stiff nylon brush, paying extra attention to textured concrete, joints, corners, and shaded edges. You should see the dark film begin to lift. Then rinse thoroughly with clean water, directing runoff away from planting beds, doors, pool equipment, and storm drains where possible.
If staining remains after the first pass, repeat the process rather than immediately escalating to stronger chemicals or extreme water pressure. Some dark discoloration is embedded in the pores and needs a second controlled treatment. A patio with years of organic buildup may require professional surface cleaning to achieve an even result.
Choosing Between Bleach-Based and Oxygen-Based Cleaners
A properly diluted bleach-based exterior cleaner can be effective on mildew and algae, particularly on plain, unsealed concrete. The trade-off is that bleach can affect landscaping, fabrics, nearby painted surfaces, and metal fixtures if it is not carefully controlled and rinsed. It also requires attentive handling around pool decks and enclosed patio areas.
Oxygen-based cleaners are often a gentler option for homeowners concerned about plants and routine maintenance. They may need more dwell time and scrubbing, and they may not cut through heavy black staining as quickly. Enzyme or specialty exterior cleaners can also be useful, but performance depends on the type of growth and the condition of the concrete.
The best choice depends on the surface and the problem. A lightly affected patio may respond well to an oxygen-based product and brush work. A large, slippery patio with established growth needs a more deliberate process that balances cleaning strength with runoff control and surface protection.
Should You Use a Pressure Washer?
A pressure washer can make concrete look dramatically better, but it is not automatically the safest solution. Used correctly, it can rinse away loosened mildew and remove ground-in dirt efficiently. Used too close to the surface or at excessive pressure, it can etch concrete, expose aggregate, blow out weak joints, and create visible wand marks.
Pressure washing is also less effective when it is used as the only step. Water may remove the top layer of growth while leaving spores and organic residue in the concrete pores. That is why professional cleaning commonly pairs the right treatment with controlled rinsing rather than relying on force alone.
Avoid using a narrow, high-impact tip on patio concrete. Keep the spray moving in even passes, maintain a safe distance from the surface, and do not aim directly at expansion joints, cracks, door thresholds, screens, or pool coping. If the patio is stamped, painted, sealed, recently repaired, or already showing surface wear, a low-pressure cleaning approach may be the better option.
Common Mistakes That Make the Problem Worse
The fastest way to create a disappointing result is to treat all concrete the same. These mistakes often lead to uneven color, surface damage, or mildew that returns sooner than expected:
- Applying a cleaner to hot concrete and allowing it to dry before rinsing.
- Using a wire brush that can scratch the surface and leave rust-prone fragments.
- Overusing bleach without protecting or pre-wetting nearby landscaping.
- Blasting a pressure washer close to the concrete until lines or etched spots appear.
- Cleaning the patio while leaves, mulch, and standing water remain against its edges.
Another common issue is overlooking the source of recurring moisture. Trim back dense vegetation that blocks airflow, adjust sprinklers that spray the patio, clear gutters and downspouts, and avoid leaving wet outdoor rugs in place for long periods. These small changes help a freshly cleaned surface stay clean longer.
When Professional Patio Cleaning Makes Sense
Professional service is worth considering when the affected area is large, the patio has become slippery, stains remain after careful cleaning, or the concrete is part of a broader exterior maintenance issue. This is especially true for condo common areas, HOA walkways, restaurant patios, pool surrounds, and commercial entryways where appearance and safe footing both matter.
A qualified cleaning team can assess whether the surface needs pretreatment, low-pressure washing, controlled pressure cleaning, stain treatment, or a combination of methods. The goal is not simply to make one spot lighter. It is to clean the patio evenly while protecting landscaping, drainage areas, walls, windows, and adjacent finishes.
For multi-story residences and commercial properties, exterior buildup is often connected to dirty walls, balconies, walkways, and hard-to-reach areas. The Cleaners Drones provides locally focused exterior cleaning solutions designed to reduce disruption while delivering visible results. Ground-level concrete requires its own material-specific approach, while drone-powered cleaning can help address upper exterior surfaces without the delays and access challenges of scaffolding or lifts.
Keep the Patio Cleaner Between Deep Cleanings
After mildew has been removed, sweep the patio regularly and rinse away pollen, leaves, and soil before they settle into the concrete. Check shaded spots after rainy weeks, because early growth is much easier to manage than a season of buildup. If furniture legs or planters create consistently dark patches, shift them occasionally to let those areas dry.
A clean patio should feel safe underfoot and look cared for without looking overworked. Start with a measured approach, protect the surfaces around it, and let the condition of the concrete guide the cleaning method. That attention now can keep a small patch of mildew from becoming a larger restoration project later.