
Drone Washing Versus Boom Lifts for Tall Buildings

A dirty exterior can make a well-managed property look neglected fast. In South Florida, salt air, humidity, algae, mildew, and windblown debris build up on walls, windows, balconies, roofs, and other elevated surfaces. When it is time to clean, the choice often comes down to drone washing versus boom lifts. Both can reach high areas, but they create very different work zones, costs, and experiences for residents, tenants, customers, and staff.

For a condominium board, property manager, or commercial building operator, the right method is not simply the one that reaches the highest point. It is the one that cleans the required surfaces safely, protects the property, and keeps daily operations moving with as little interruption as possible.

Drone Washing Versus Boom Lifts: The Core Difference

A boom lift carries a cleaning technician in an elevated platform. The operator drives or positions the machine, raises the boom, and works from the basket with hoses, cleaning equipment, and personal fall-protection equipment. This is a familiar approach for exterior maintenance, but it requires enough ground space for the equipment and a carefully managed exclusion zone below.

Drone washing uses a purpose-built aerial system to deliver low-pressure water and cleaning solution to elevated exterior surfaces. A trained ground crew operates the drone while controlling the cleaning path from below. The method is designed to remove organic buildup and surface grime without placing a technician in a raised basket or installing scaffolding along the building.

Neither approach is automatically right for every job. The best choice depends on the building layout, the material being cleaned, the height and condition of the surface, available access, and whether the work requires close hands-on repair or detailed manual treatment.

Safety Starts With How Workers Reach the Surface

Working at height always deserves serious planning. With boom lifts, workers are elevated above the ground and must manage platform positioning, overhead obstructions, wind conditions, traffic, pedestrians, and the risk of contact with the building. A properly operated lift can be safe, but the work involves heavy machinery, trained operators, inspection requirements, and a larger active job site.

Drone cleaning removes the need to place a technician at the cleaning height for many exterior washing tasks. That can reduce exposure to fall hazards and eliminate the risk of a lift basket contacting balconies, glass, landscaping, parked vehicles, or façade features. It is especially useful where the building has limited clearance, soft ground, narrow drive lanes, or landscaping that would be difficult to work around with heavy equipment.

That does not mean drone washing eliminates the need for site controls. A professional crew still establishes a safe ground area, monitors weather, protects nearby people and property, and follows a defined flight and cleaning plan. The difference is that the elevated access point is an aerial cleaning system rather than a worker standing in a platform.

Wind, Weather, and Building Conditions Still Matter

South Florida weather can change quickly. Wind, rain, lightning, and surface saturation affect both drone work and boom-lift work. A responsible provider will pause or reschedule when conditions do not support safe, quality cleaning.

The condition of the building also matters. Loose stucco, damaged seals, failing paint, cracked windows, and deteriorated caulking are maintenance issues, not problems to wash away. A careful pre-job assessment helps identify areas that need repair before any exterior cleaning begins.

Less Disruption Can Be a Major Advantage

Boom lifts require room to enter, stage, move, and operate. On a busy property, that can mean reserved parking spaces, blocked drive lanes, temporary traffic controls, noise from equipment, and restricted access around the work area. For a retail center, medical office, school, condominium, or active apartment community, those disruptions may affect customer access and resident routines.

Drone washing can often be performed with a smaller ground footprint. There is no large lift traveling across the property, no scaffolding around the façade, and fewer reasons to close off broad sections of parking or walkways. This can be particularly valuable for properties with tight parking, decorative pavers, fragile landscaping, pool decks, or limited service access behind the building.

Smaller work zones do not mean no work zones. Cleaning runoff, hose routing, and pedestrian safety still require planning. The practical advantage is that the controlled area is often easier to manage than the space needed for a large aerial lift.

Cost Is About More Than the Daily Equipment Rate

A boom lift may appear straightforward: rent or mobilize the machine, provide trained operators, and clean the building. But the total project cost can grow when a property needs multiple lift positions, extended equipment time, special access approvals, traffic management, surface protection, or after-hours scheduling to avoid disrupting tenants.

Drone cleaning may reduce some of those access-related costs because it does not require lift rental, repeated repositioning, or extensive site staging. The work can also move efficiently across high and difficult-to-reach elevations when the building and cleaning scope are a good fit.

Still, a lower-cost option is not always the best value. A surface that needs scraping, hand detailing, sealant repairs, or close physical inspection may require a technician in a lift or another access method. The most useful quote explains what is being cleaned, what method is proposed, which areas may need special treatment, and what the property can expect during service.

Cleaning Results Depend on the Surface and the Soil

For exterior washing, pressure alone is not the measure of a good result. Too much pressure can damage painted finishes, stucco, soft wood, seals, screens, and other building materials. South Florida properties often benefit from a low-pressure cleaning approach that uses the right cleaning solution and dwell time to treat algae, mildew, and grime without forcing water where it does not belong.

Drone washing is well suited to broad vertical surfaces and elevated exterior areas affected by organic growth and airborne dirt. It can help restore a cleaner, more consistent appearance across façades, upper walls, roofs, and hard-to-access sections where a lift would be inconvenient or impractical.

Boom lifts remain useful when a technician needs to work inches from the surface for a detailed task. Examples include hand-cleaning delicate architectural elements, accessing recessed areas, replacing fixtures, inspecting damage, or completing repair work alongside washing. The access method should follow the scope of work, not the other way around.

When a Boom Lift May Be the Better Choice

There are situations where a lift remains the practical solution. A property may need close-up manual work on a small, isolated area. The cleaning scope may include repairs that require tools and a technician at height. Some building configurations, enclosed courtyards, overhangs, or narrow spaces can also limit safe drone flight paths.

A lift can also be effective where there is wide, stable access around the structure and where the disruption of equipment staging is manageable. For a low-rise commercial property with an open service lane, the traditional method may be entirely appropriate.

The key is honest evaluation. A provider should not force drone cleaning onto a property that needs hands-on elevated work, and a property should not assume a boom lift is required simply because the building is tall.

Questions Property Decision-Makers Should Ask

Before scheduling exterior cleaning, ask how the crew will access each elevation, where equipment and hoses will be staged, and how residents or customers will be protected. Ask whether the process uses low pressure on sensitive surfaces, how runoff will be managed, and whether the provider will identify pre-existing damage before work begins.

It is also smart to ask how much parking, landscaping, or driveway access will be affected. For HOA boards and property managers, those operational details can matter as much as the final appearance. A good plan should include clear timing, site communication, and realistic expectations about weather-related adjustments.

A Better Fit for Many South Florida Properties

Drone washing is changing what exterior cleaning can look like for high-rise buildings, condominiums, hotels, commercial properties, and multi-story homes. It offers a modern access solution that can reduce reliance on scaffolding and heavy lifts while supporting a safer, less disruptive cleaning process.

At the same time, smart property maintenance is never one-size-fits-all. The Cleaners Drones evaluates the surface, access conditions, cleaning goals, and property activity before recommending a method. The goal is visible improvement without creating unnecessary risk or disruption for the people who live, work, and visit there.

A clean exterior protects curb appeal and reinforces confidence in how a property is cared for. Start with a site-specific assessment, choose the access method that fits the actual work, and give your building the attention it deserves.
Drone Window Washing for South Florida Buildings

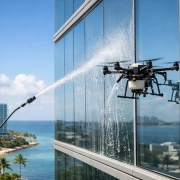
A streaked upper floor can make an otherwise well-managed property look neglected from the street. For Palm Beach County condos, commercial buildings, and multi-story homes, the challenge is rarely recognizing dirty glass. It is finding a practical way to clean it without closing off access areas, scheduling lifts, or putting crews in difficult positions. Drone window washing gives property owners and managers another option for reaching exterior glass safely and efficiently.

Unlike a small consumer drone with a camera, professional exterior-cleaning drones are purpose-built working systems. They deliver controlled, low-pressure cleaning solutions and water to elevated surfaces while an experienced operator manages the flight path from the ground. The goal is straightforward: remove airborne salt, dust, mildew, pollen, and surface grime that dulls windows, frames, and nearby exterior finishes.

Why exterior glass gets dirty so quickly in South Florida

South Florida buildings deal with a combination of conditions that ordinary maintenance schedules do not always account for. Humidity encourages organic growth around frames and ledges. Afternoon storms leave mineral residue. Coastal properties may collect salt spray, while traffic corridors add fine dust and exhaust film.

Glass can still look cloudy even after rain because rain does not rinse contaminants evenly or remove the film that has already bonded to the surface. Window frames, seals, and trim can also hold dirt that draws attention away from otherwise clean glass. Regular exterior cleaning protects the polished, cared-for appearance residents, guests, and tenants expect.

For a property manager, that appearance affects more than curb appeal. Clean windows improve daylight, make common areas feel better maintained, and support the overall presentation of the building during tours, inspections, and resident visits. For homeowners, it is often about finally being able to enjoy the view without stains and buildup at hard-to-reach elevations.

How drone window washing works

The right approach begins with an assessment of the building, the glass condition, surrounding access, and weather. Not every window needs the same treatment, and no responsible contractor should use the same pressure or cleaning chemistry on every exterior surface.

A professional crew establishes a safe ground area, identifies obstacles such as balconies, trees, power lines, and pedestrian paths, then plans the cleaning sequence. The drone is operated close enough to apply a controlled low-pressure rinse and cleaning solution where needed. The system can reach upper-story windows and exterior surfaces without relying on scaffolding or a boom lift in many situations.

For routine buildup, low-pressure cleaning can remove the dirt, organic residue, and environmental film that make exterior glass look dull. The process is especially useful for broad areas of upper-level glass, window surrounds, façades, and difficult-to-access exterior details.

Results depend on the condition of the glass. Fresh surface grime responds differently than etched hard-water deposits, oxidized frames, damaged seals, or construction residue. A qualified cleaning company should explain what cleaning can improve and what may require specialty restoration or a different method.

It is not a one-size-fits-all replacement for hand detailing

Drone cleaning is a powerful access solution, but it is not a shortcut for every job. Some windows may need hand-detailing for interior glass, stubborn spots, deep track cleaning, or precision work around delicate architectural features. Ground-floor glass and easily accessible areas may be more efficiently cleaned using traditional methods.

That is not a drawback. It is how good property maintenance works. The best plan may combine drone-based exterior cleaning for upper elevations with conventional cleaning for entrances, storefronts, interior-facing glass, and areas requiring close manual attention. The result is a more complete service without paying for lifts or scaffolding where they are not necessary.

What property decision-makers gain

Traditional high-access window cleaning often brings a long list of operational concerns: lift positioning, parking restrictions, blocked drive lanes, noise, lengthy setup, and work zones that affect residents or customers. Drone window washing can reduce many of those burdens.

The biggest benefit is safer access. Cleaning from the ground reduces the need to place workers on ladders, suspended platforms, or elevated equipment for suitable areas of the project. It also reduces the amount of heavy machinery that must be staged around the property.

There is a practical cost benefit as well. A drone does not eliminate labor or planning, but it can reduce the equipment requirements that drive up the cost of accessing multi-story exterior surfaces. For HOAs and commercial operators managing budgets across several buildings, that difference can make routine exterior cleaning more achievable.

The service also helps keep the property functioning while work is underway. Fewer obstructions can mean less disruption to residents entering a condominium, guests arriving at a hotel, patients visiting an office, or customers parking near a retail location. Timing still matters, especially around busy entrances, but the footprint is often much smaller than a lift-based operation.

When a drone is the right choice

Drone cleaning is particularly well suited to buildings with hard-to-reach upper windows, exterior glass above landscaping, tall façades, condominium towers, parking areas with limited equipment access, and multi-story residences. It can also be a smart choice when a property needs a visible refresh before an event, inspection, listing, or seasonal peak.

Weather and site conditions matter. High winds, lightning, heavy rain, restricted airspace, overhead hazards, or close proximity to sensitive areas may require rescheduling or another cleaning method. A professional team should never force a flight simply to stay on a calendar.

Material condition matters too. Older glass, cracked panes, failing sealant, loose trim, and fragile finishes should be identified before cleaning begins. Low-pressure methods are designed to be gentler than aggressive washing, but careful evaluation remains essential. The objective is to clean the surface, not create a maintenance problem.

Questions to ask before scheduling service

Before approving a drone window washing project, ask how the company evaluates surface materials, manages pedestrian safety, handles weather delays, and protects nearby landscaping and finishes. Ask whether the cleaning products are appropriate for the property and whether the crew has experience with the specific building type.

It is also useful to discuss expectations. Are you looking for a routine exterior wash, a brighter appearance before a board meeting, or help with visible salt and mildew buildup? Is the concern limited to glass, or do window frames, stucco, balconies, and adjacent exterior surfaces also need attention? Clear answers help the contractor build a realistic scope rather than treating every building like the last one.

For larger properties, consider setting a maintenance schedule based on exposure rather than waiting until the dirt becomes obvious. Coastal-facing buildings, heavily shaded areas, and high-traffic locations may need more frequent attention than a protected inland property. A consistent schedule can help avoid the heavier buildup that takes more time and effort to remove.

A modern solution with a practical purpose

Technology only matters when it solves a real problem. In this case, the problem is access: windows and exterior surfaces that need care but are expensive, disruptive, or risky to reach by conventional means. The Cleaners Drones uses drone-powered, low-pressure exterior cleaning to help South Florida properties maintain a cleaner appearance with less equipment around the building.

The best results come from matching the method to the property, the material, and the condition of the glass. When upper-level windows are clouded by Florida weather and access is the obstacle, a professionally managed drone service can turn a difficult maintenance task into a manageable part of caring for the property.

Emergency Water Extraction Service Steps

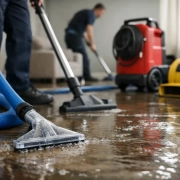
A burst supply line behind a vanity can release far more water than most homeowners expect. By the time water reaches a hallway, baseboards, cabinets, and flooring may already be absorbing moisture. An emergency water extraction service is designed for this moment: remove standing water quickly, identify where it traveled, and begin drying before a small leak becomes a major restoration project.

For Palm Beach County homes, condos, and commercial properties, fast action matters especially because humidity slows natural drying. Opening windows or aiming a household fan at wet flooring may feel helpful, but it rarely addresses the moisture trapped beneath surfaces or inside walls. The goal is not simply to make the floor look dry. It is to return affected materials to an appropriate moisture level safely and thoroughly.

Start With Safety and Stop the Water Source

If water is actively flowing, shut off the nearest fixture valve or the property’s main water supply if it is safe to do so. A leaking refrigerator line, toilet supply line, washing machine hose, or water heater can keep adding damage by the minute. For a roof or window leak during heavy rain, move valuables away from the area and contain water only if doing so does not create a slip or electrical hazard.

Do not walk through standing water near outlets, cords, appliances, or an electrical panel. Turn off power to the affected area only when it is safe and you know which breaker controls it. If water has reached electrical equipment, call a qualified electrician as needed before anyone begins work.

The type of water also changes the response. Clean water from a broken supply line is different from water involving a toilet overflow, sewage backup, or exterior floodwater. Contaminated water requires protective procedures and careful removal of affected materials. Do not try to shop-vac sewage or floodwater without the right equipment and training.

What an Emergency Water Extraction Service Does

Water damage restoration has a sequence. Skipping steps can leave moisture behind, creating odors, warping, staining, and conditions that may support mold growth. A professional response begins with an assessment of the source, the category of water, and the rooms or building components affected.

Extraction Comes Before Drying

The first priority is removing standing water. Professional extraction equipment can pull water from carpet, padding, hard surfaces, and other accessible areas much more effectively than towels or a small wet vacuum. The faster water is removed, the less time it has to soak through flooring, under baseboards, and into lower wall sections.

Carpet can sometimes be saved after a clean-water event, depending on how long it was wet, the amount of water involved, and the condition of the padding and subfloor. In other cases, saturated padding must be removed because it holds moisture and can prevent the structure below from drying properly. A reliable technician should explain the recommendation rather than treating every water loss the same way.

Moisture Detection Finds What You Cannot See

Standing water is only part of the problem. Water follows gravity, slips beneath flooring, wicks into drywall, and travels through shared walls in condominiums and multi-unit buildings. Moisture meters and thermal imaging help identify affected areas without unnecessary demolition.

This step matters in South Florida condos, where water can move between units and impact neighboring ceilings, wall cavities, and common areas. Property managers and HOA boards need a clear picture of the extent of damage quickly so they can coordinate access, notify residents, and protect the building.

Controlled Drying Protects Materials

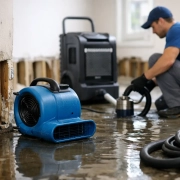
After extraction, technicians place commercial air movers and dehumidifiers to remove remaining moisture from materials and the air. Equipment placement is based on the affected materials and the size of the loss, not just the room’s square footage. Wood flooring, engineered flooring, drywall, cabinets, carpet, and concrete each respond differently to moisture.

Daily or scheduled monitoring is part of a proper drying plan. Technicians check moisture readings, adjust equipment, and document progress until the area reaches drying goals. Removing equipment too early can leave hidden moisture behind. Running it longer than necessary can add inconvenience and energy use, so measurement is what keeps the process focused.

The First Hours Make a Difference

Water damage does not always look dramatic at first. A small amount of water under vinyl plank flooring or inside a cabinet toe-kick can create problems days later. Prompt extraction reduces the chance that materials will swell, separate, or require replacement.

Move lightweight furniture, rugs, electronics, paper items, and fabric belongings away from the affected area if it is safe. Place foil or protective blocks under furniture legs that cannot be moved, and avoid placing wet items on dry carpet or upholstered furniture. Take photos of visible damage for your records before major cleanup begins.

Avoid these common mistakes:

  • Do not use a household vacuum to remove water.
  • Do not lift wall-to-wall carpet if you are unsure how to handle it or if contamination is possible.
  • Do not assume a dry surface means the subfloor or wall is dry.
  • Do not run ceiling fans or HVAC systems if contaminated water may have affected the area.
  • Do not delay because the leak appears minor or has stopped.

For commercial spaces, quick containment also helps preserve operations. A water event in an office, retail space, fitness center, or lobby may require isolating a small area, protecting equipment, and creating a drying plan around tenants, customers, and staff. The right approach balances speed with a clean, organized work area.

When Water Damage Requires More Than Extraction

Extraction is the urgent first service, but it is not always the final one. Materials may need cleaning, sanitizing, repair, or replacement based on the water source and the time they remained wet. Drywall that has absorbed contaminated water, for example, may need to be removed. Cabinet components, baseboards, insulation, and flooring can require separate decisions after moisture readings and condition checks.

Mold is another reason not to treat water damage as a cosmetic issue. Mold can begin to grow when moisture remains in building materials, though the risk and required response depend on conditions at the property. Fast extraction and verified drying are practical prevention steps. If visible growth is present or moisture has persisted, the scope of work may need to expand beyond standard water removal.

Insurance is also a case-by-case matter. Coverage often depends on the cause of loss, policy language, maintenance history, and whether the water came from inside or outside the property. Keep photos, invoices, and communication records. A professional restoration team can provide documentation of observed damage, extraction work, equipment placement, and drying progress, but your insurer makes the coverage decision.

Water Extraction for Condos and South Florida Properties

In a condo or high-rise, a leak in one unit can become a building-wide coordination issue. Water may travel downward into ceilings, along plumbing penetrations, or across shared structural areas. Residents should notify building management promptly, while managers should document the event, coordinate unit access, and confirm whether adjacent spaces need moisture inspection.

For single-family homes, common causes include failed appliance hoses, air conditioner condensate line issues, plumbing leaks, roof intrusion, and water heater failures. South Florida’s intense rain events add another variable. Exterior water intrusion may need a different plan than a clean indoor plumbing leak, particularly when stormwater or floodwater is involved.

The Cleaners Drones approaches water damage with the same focus that guides every property service: clear communication, careful work, and visible progress. The immediate objective is to protect the property, limit disruption, and give the owner or manager a straightforward understanding of what happens next.

Call Before the Damage Spreads

If water is standing, spreading, or has reached flooring, walls, cabinets, or neighboring units, treat it as a time-sensitive property issue. Shut off the source when safe, protect people and valuables, and arrange professional assessment and extraction as soon as possible.

A fast, measured response can be the difference between drying a contained area and replacing materials that had a chance to stay wet. When the water is under control, the next best step is simple: make sure the moisture you cannot see is being checked just as carefully as the water you can.

Water Damage Restoration Steps That Protect Property

A washing machine hose fails behind the wall, a water heater leaks overnight, or wind-driven rain finds one weak point in a roof. The visible puddle is only part of the problem. Effective water damage restoration addresses the moisture you can see and the moisture already moving through flooring, drywall, insulation, cabinets, and framing.

For Palm Beach County homeowners, condo boards, property managers, and business owners, speed matters. South Florida humidity can slow natural drying, while air conditioning systems and enclosed spaces can hide damp materials long after the surface looks clean. The right response protects the building, limits interruption, and gives you a clear picture of what needs to happen next.

The First Hours Matter Most

Start by protecting people and stopping the source of water if it is safe to do so. Shut off the local supply valve or main water line for a plumbing leak. If water is near electrical outlets, appliances, or a breaker panel, stay clear and contact a qualified professional. Never enter standing water where electricity may be present.

Move dry, valuable items away from the affected area when possible. Furniture, documents, electronics, inventory, and area rugs can often be protected if they are removed early. Avoid walking water from one room to another, especially over carpet or wood flooring.

Then document the damage. Take photos and videos before removing materials or beginning cleanup. This record can help with insurance communication and gives the restoration team a useful baseline. If the loss is significant, notify your insurance carrier promptly, but do not wait for an adjuster before taking reasonable steps to prevent further damage.

What Professional Water Damage Restoration Includes

Restoration is not simply putting fans in a wet room. A professional process begins with inspection and moisture detection. Water may travel under vinyl plank flooring, wick upward into drywall, collect beneath cabinets, or soak insulation behind a wall. Moisture meters, thermal imaging, and hygrometers help identify where drying is needed.

1. Inspection and a Clear Scope of Work

The first question is where the water came from. A clean supply-line leak is handled differently from a toilet overflow, stormwater intrusion, or sewage backup. The category of water affects what can be safely cleaned, what must be removed, and the protective procedures required.

The restoration team should identify affected materials, take moisture readings, and explain the plan in practical terms. That includes which areas can likely be dried in place, which materials may need removal, how equipment will be positioned, and what access is required from residents or staff.

2. Water Extraction and Controlled Removal

Removing bulk water quickly reduces the amount that can absorb into surrounding materials. Professional extractors pull water from carpet, padding, hard surfaces, and low areas that mops cannot adequately address.

Some materials do not recover well after prolonged saturation. Carpet padding, swollen particleboard cabinets, wet insulation, and severely damaged drywall may need removal to allow the structure behind them to dry. It can feel frustrating to remove materials that appear mostly intact, but leaving wet layers trapped in place can create a larger repair later.

3. Structural Drying, Not Surface Drying

Air movers and dehumidifiers work together to move moisture out of materials and capture it from the air. The equipment setup depends on the size of the affected area, the building materials, the amount of water, and the indoor conditions.

In South Florida, opening windows is not always helpful. Outdoor humidity can introduce more moisture into the property and make drying equipment less effective. Controlled drying with the right equipment is usually a better approach than relying on ceiling fans, open doors, or a household dehumidifier alone.

4. Monitoring Until Moisture Levels Return to Normal

Drying is measured, not guessed. A restoration team should revisit the property, adjust equipment when needed, and compare readings to dry materials in unaffected areas. Floors and walls can look normal while still holding moisture that may lead to odors, warping, or microbial growth.

Once readings indicate the area is dry, equipment can be removed and repairs can move forward. This documentation also provides valuable support for property managers, HOAs, and insurance files.

Why Mold Prevention Is Part of the Job

Mold does not require a dramatic flood. A slow plumbing leak beneath a vanity, moisture behind a refrigerator line, or wet drywall after a roof leak can create the conditions mold needs. The risk increases when materials remain damp for more than a day or two.

Fast extraction and drying are the first line of defense. If visible growth, strong musty odors, or widespread contamination is present, the work may require containment and more specialized remediation procedures. The correct response depends on the source of water, the materials involved, and how long they have been wet.

Do not cover odors with fragrance, paint over staining, or reinstall baseboards before moisture levels are confirmed. Those shortcuts can conceal a problem without solving it.

When DIY Cleanup Is Enough and When It Is Not

A small spill on a sealed tile floor may only need towels and quick drying. If the water is clean, contained, and removed immediately, a homeowner can often manage the situation.

Professional help is the safer choice when water has entered carpet, wood flooring, drywall, cabinets, insulation, or multiple rooms. The same applies to sewage, water from a toilet overflow, stormwater, recurring leaks, visible mold, or water that has been standing for an unknown amount of time. Commercial properties and multifamily buildings also need a coordinated response because water can travel between units, suites, floors, and shared building systems.

There is a trade-off to consider. Calling a restoration company may feel like a bigger step for a small incident, but fast assessment can prevent a minor leak from becoming flooring replacement, cabinet repairs, mold work, or tenant disruption. The goal is not to remove materials unnecessarily. It is to make informed decisions before hidden moisture has time to spread.

Water Damage in Condos and Commercial Properties

Condominiums create a unique set of questions. Is the leak coming from an upstairs unit, a common plumbing stack, a roof, or inside the affected unit? Who is responsible for access, mitigation, and repairs? Quick documentation and communication help prevent delays while responsibility is being determined.

For property managers and commercial operators, restoration should protect continuity as much as possible. Equipment may need to be placed safely around residents, customers, or employees. Work areas may require clear signage, scheduled access, and daily updates. A dependable team understands that drying a space is only one part of protecting the property.

The Cleaners Drones serves Palm Beach County with practical water damage response focused on detailed inspection, controlled drying, and clear communication. Whether the affected space is a home, condo unit, office, or common area, the priority is to reduce damage before it expands.

Questions Property Owners Often Ask

Can I stay in the property while drying equipment is running?

Often, yes. It depends on the size of the affected area, the type of water involved, electrical safety, noise tolerance, and whether any materials must be removed. For a business or occupied condo, the restoration plan should account for safe access and daily operations whenever possible.

How long does water damage restoration take?

Drying commonly takes several days, but no two losses are identical. A small, clean water event addressed quickly may dry faster. Water trapped under flooring, inside walls, or beneath cabinets can extend the timeline. Repairs after drying, such as drywall, flooring, paint, or cabinet work, take additional time.

Will insurance cover the work?

Coverage depends on the policy and the cause of loss. Sudden accidental plumbing leaks are often handled differently from long-term seepage, maintenance issues, or floodwater. Keep records, photographs, invoices, and moisture documentation, and speak directly with your insurer about your policy.

A leak does not have to become a major restoration project. Acting quickly, drying with purpose, and confirming the property is truly dry gives you the best chance to protect the space you have worked hard to maintain.

How to Remove Mildew From Patio Concrete

That dark green or black film on a patio is more than an appearance problem. In Palm Beach County, warm temperatures, humidity, shade, and frequent rain can allow mildew, algae, and organic buildup to return quickly. Knowing how to remove mildew from patio concrete correctly helps restore the clean, bright surface you want without damaging the concrete, surrounding plants, or nearby finishes.

For a small, recent patch, a careful DIY cleaning can work well. For widespread buildup, slippery surfaces, pavers near a pool, or stains that keep returning, the method matters just as much as the cleaner. Concrete is durable, but it is not indestructible. Aggressive pressure, the wrong chemical concentration, or poor rinsing can leave behind etched areas, streaking, or runoff problems.

Why Patio Concrete Gets Mildew in South Florida

Mildew needs moisture and organic material to grow. Patio concrete provides a textured, porous surface where pollen, leaf debris, dirt, and moisture can settle. Areas beneath trees, beside privacy walls, behind furniture, and near sprinklers usually develop growth first because they dry more slowly.

What looks like mildew may also be algae, particularly when the stain is green and feels slick underfoot. Black spotting can be mildew, mold, embedded grime, or staining from leaves and irrigation. The distinction does not always change the cleaning approach, but it does explain why a patio can become hazardous before it looks severely dirty.

Regular sweeping and drainage make a real difference. If water repeatedly pools along an edge or downspout, cleaning alone will not be a long-term fix. The surface will likely grow dark again until the moisture source is addressed.

What You Need Before You Clean

Start on a dry day with enough time for the patio to be fully rinsed and air out. Move furniture, planters, rugs, toys, and grills off the concrete. Sweep away loose leaves and sand so the cleaning solution can reach the buildup instead of getting diluted by debris.

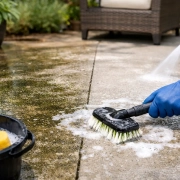
For most small residential areas, gather a stiff nylon push broom or deck brush, a bucket, a garden hose with a spray nozzle, gloves, eye protection, and a cleaner suitable for exterior concrete. A nylon brush is the safer choice. Wire brushes can leave metal fragments behind that later rust on the concrete.

Protect the edges of the work area before applying any solution. Wet nearby grass and plants with plain water, cover sensitive landscaping when practical, and keep pets and children away until the patio has been thoroughly rinsed and dried. Never mix cleaning chemicals. In particular, bleach should never be combined with ammonia, acids, or other household cleaners.

How to Remove Mildew From Patio Concrete Safely

Begin by testing your chosen cleaner in a small, less visible spot. This is especially useful on colored concrete, decorative coatings, stamped finishes, or concrete close to painted walls. Follow the product label rather than assuming that a stronger mix will give a better result.

Apply the solution evenly to a manageable section of patio. Let it sit only for the recommended dwell time. The goal is to loosen and kill surface growth, not allow chemical to dry into the concrete. In South Florida sun, solutions can dry faster than expected, so work in smaller sections or choose a cooler part of the day.

Scrub the treated area with a stiff nylon brush, paying extra attention to textured concrete, joints, corners, and shaded edges. You should see the dark film begin to lift. Then rinse thoroughly with clean water, directing runoff away from planting beds, doors, pool equipment, and storm drains where possible.

If staining remains after the first pass, repeat the process rather than immediately escalating to stronger chemicals or extreme water pressure. Some dark discoloration is embedded in the pores and needs a second controlled treatment. A patio with years of organic buildup may require professional surface cleaning to achieve an even result.

Choosing Between Bleach-Based and Oxygen-Based Cleaners

A properly diluted bleach-based exterior cleaner can be effective on mildew and algae, particularly on plain, unsealed concrete. The trade-off is that bleach can affect landscaping, fabrics, nearby painted surfaces, and metal fixtures if it is not carefully controlled and rinsed. It also requires attentive handling around pool decks and enclosed patio areas.

Oxygen-based cleaners are often a gentler option for homeowners concerned about plants and routine maintenance. They may need more dwell time and scrubbing, and they may not cut through heavy black staining as quickly. Enzyme or specialty exterior cleaners can also be useful, but performance depends on the type of growth and the condition of the concrete.

The best choice depends on the surface and the problem. A lightly affected patio may respond well to an oxygen-based product and brush work. A large, slippery patio with established growth needs a more deliberate process that balances cleaning strength with runoff control and surface protection.

Should You Use a Pressure Washer?

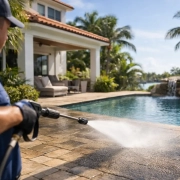
A pressure washer can make concrete look dramatically better, but it is not automatically the safest solution. Used correctly, it can rinse away loosened mildew and remove ground-in dirt efficiently. Used too close to the surface or at excessive pressure, it can etch concrete, expose aggregate, blow out weak joints, and create visible wand marks.

Pressure washing is also less effective when it is used as the only step. Water may remove the top layer of growth while leaving spores and organic residue in the concrete pores. That is why professional cleaning commonly pairs the right treatment with controlled rinsing rather than relying on force alone.

Avoid using a narrow, high-impact tip on patio concrete. Keep the spray moving in even passes, maintain a safe distance from the surface, and do not aim directly at expansion joints, cracks, door thresholds, screens, or pool coping. If the patio is stamped, painted, sealed, recently repaired, or already showing surface wear, a low-pressure cleaning approach may be the better option.

Common Mistakes That Make the Problem Worse

The fastest way to create a disappointing result is to treat all concrete the same. These mistakes often lead to uneven color, surface damage, or mildew that returns sooner than expected:

  • Applying a cleaner to hot concrete and allowing it to dry before rinsing.
  • Using a wire brush that can scratch the surface and leave rust-prone fragments.
  • Overusing bleach without protecting or pre-wetting nearby landscaping.
  • Blasting a pressure washer close to the concrete until lines or etched spots appear.
  • Cleaning the patio while leaves, mulch, and standing water remain against its edges.

Another common issue is overlooking the source of recurring moisture. Trim back dense vegetation that blocks airflow, adjust sprinklers that spray the patio, clear gutters and downspouts, and avoid leaving wet outdoor rugs in place for long periods. These small changes help a freshly cleaned surface stay clean longer.

When Professional Patio Cleaning Makes Sense

Professional service is worth considering when the affected area is large, the patio has become slippery, stains remain after careful cleaning, or the concrete is part of a broader exterior maintenance issue. This is especially true for condo common areas, HOA walkways, restaurant patios, pool surrounds, and commercial entryways where appearance and safe footing both matter.

A qualified cleaning team can assess whether the surface needs pretreatment, low-pressure washing, controlled pressure cleaning, stain treatment, or a combination of methods. The goal is not simply to make one spot lighter. It is to clean the patio evenly while protecting landscaping, drainage areas, walls, windows, and adjacent finishes.

For multi-story residences and commercial properties, exterior buildup is often connected to dirty walls, balconies, walkways, and hard-to-reach areas. The Cleaners Drones provides locally focused exterior cleaning solutions designed to reduce disruption while delivering visible results. Ground-level concrete requires its own material-specific approach, while drone-powered cleaning can help address upper exterior surfaces without the delays and access challenges of scaffolding or lifts.

Keep the Patio Cleaner Between Deep Cleanings

After mildew has been removed, sweep the patio regularly and rinse away pollen, leaves, and soil before they settle into the concrete. Check shaded spots after rainy weeks, because early growth is much easier to manage than a season of buildup. If furniture legs or planters create consistently dark patches, shift them occasionally to let those areas dry.

A clean patio should feel safe underfoot and look cared for without looking overworked. Start with a measured approach, protect the surfaces around it, and let the condition of the concrete guide the cleaning method. That attention now can keep a small patch of mildew from becoming a larger restoration project later.

Pressure Washing for South Florida Properties

A clean driveway can change the way an entire property looks before anyone reaches the front door. In Palm Beach County, pressure washing is not simply a cosmetic service. Humidity, frequent rain, salt air, irrigation overspray, pollen, algae, mildew, and vehicle traffic leave exterior surfaces stained and slippery faster than many owners expect.

The right cleaning method restores that fresh, cared-for appearance without damaging the surface underneath. That distinction matters. A concrete driveway, paver patio, painted stucco wall, tile roof, wood deck, and multi-story building exterior all require different pressure, cleaning solutions, and access plans.

Why South Florida Exteriors Get Dirty So Quickly

South Florida’s climate creates ideal conditions for organic growth. Moisture settles into shaded areas, porous materials hold water, and warm temperatures allow algae and mildew to spread across concrete, pavers, walls, fences, and roof surfaces. A surface may look like it only has a few dark streaks, but those streaks can expand quickly after a stretch of wet weather.

Irrigation can add another layer of trouble. Water containing minerals may leave rust-colored stains on walls, sidewalks, curbs, and pool decks. Near the coast, salt particles can cling to exterior finishes and glass, dulling their appearance over time. Commercial properties also contend with gum, oil spots, loading-area grime, and the constant foot traffic that turns a clean walkway into a first-impression problem.

For homeowners, a dirty driveway or patio can make an otherwise well-maintained home feel neglected. For HOA boards, condominium managers, and business owners, the concern is larger: resident satisfaction, curb appeal, safety, and protecting exterior materials across a shared property.

Pressure Washing Is Not One Setting for Every Surface

The term pressure washing describes a process, not a single technique. High pressure can be highly effective on durable materials such as properly cured concrete, but it can scar, etch, strip, or loosen more delicate surfaces when used carelessly. Professional cleaning begins with identifying what is being cleaned and what caused the staining.

Concrete driveways and sidewalks often benefit from controlled pressure combined with the right pre-treatment. The goal is to remove embedded dirt and organic buildup evenly, rather than leaving visible wand marks or bright streaks across the surface. Pavers require additional attention because excessive force can disturb joint sand or expose weak areas. When pavers are already loose, cracked, or heavily worn, cleaning should be approached carefully and discussed before work begins.

Stucco, painted siding, screened enclosures, awnings, and exterior trim usually call for a lower-pressure approach. These surfaces can look dramatically better after cleaning, but forcing water into seams, vents, or damaged finishes creates avoidable risk. Roofs are another category entirely. Many roof materials should be cleaned with a soft-wash method that uses low pressure and appropriate cleaning solutions, not the aggressive pressure used on a driveway.

A qualified team should inspect for cracked grout, peeling paint, damaged screens, loose pavers, failed caulking, fragile landscaping, and areas where water must be directed away from doors, electrical components, and drainage-sensitive spaces. Cleaning is more effective when the preparation is as careful as the wash itself.

What a Professional Exterior Cleaning Visit Should Address

A dependable service should do more than make a surface look better for a day. It should account for the property’s materials, layout, traffic patterns, and nearby landscape. Before cleaning begins, the crew should clarify the work area and identify any problem stains that may need specialized treatment.

Oil stains, rust, tire marks, paint overspray, leaf tannins, and black algae do not respond the same way. Some improve significantly with the right treatment but may not disappear completely, especially when staining has been present for years or has penetrated a porous surface. Clear expectations are part of good service, not a limitation.

Landscaping also deserves attention. Plants should be protected, rinsed as appropriate, and monitored when cleaning solutions are used nearby. Pool areas need thoughtful runoff management, while commercial entrances may need work scheduled around customer traffic. For HOA and multifamily properties, communicating the cleaning schedule can reduce parking conflicts and prevent residents from walking through active work zones.

The visual difference is often immediate: brighter concrete, cleaner pavers, clearer edges along curbs, and exterior walls that look closer to their original color. The longer-term benefit is just as valuable. Regular cleaning helps property owners stay ahead of buildup before it becomes a bigger maintenance project.

Safer Access for Tall and Difficult Exteriors

Pressure washing becomes more complicated when the areas needing attention are several stories above ground. Traditional cleaning methods may require ladders, lifts, scaffolding, large work zones, and extended scheduling. Those options can be necessary in certain situations, but they can also create disruption for residents, tenants, customers, and building operations.

For high-rise buildings, condominiums, multi-story homes, and commercial properties, drone-powered exterior cleaning offers a practical alternative for appropriate surfaces. The Cleaners Drones uses aerial technology with eco-friendly, low-pressure cleaning methods to reach elevated exteriors without relying on scaffolding or lifts in many applications.

That approach can reduce ground-level congestion and limit the access challenges that come with tall structures. It is particularly useful for exterior walls and hard-to-reach building areas where a traditional crew would need extensive equipment to work safely. The method is not a substitute for every repair, inspection, or cleaning need, but it can be an efficient solution when the priority is exterior washing with less disruption.

Property managers should still consider access points, resident notices, parking arrangements, nearby pedestrian areas, and the condition of the exterior finish. A site-specific plan is always better than assuming one cleaning method fits every building.

How Often Should You Schedule Pressure Washing?

There is no universal schedule because exposure varies widely across South Florida properties. A shaded home with mature trees, a coastal condominium, a busy retail center, and a lightly used patio will accumulate grime at different rates. Many owners benefit from annual service, while high-traffic or heavily shaded areas may need attention more often.

Instead of waiting until the whole property looks dirty, watch for early signs. Dark or green growth on concrete, slippery walkways after rain, black streaks on exterior walls, dull pavers, and visible staining near irrigation heads are all reasons to schedule an evaluation. Addressing these conditions early is usually easier than removing deeply established buildup.

For commercial and multifamily properties, routine cleaning can be coordinated around operations. Walkways, entrances, dumpster pads, parking areas, breezeways, and common patios may be scheduled in sections to keep access open. The right timing protects the property’s appearance without creating unnecessary inconvenience for the people who use it every day.

Getting Better Results From Your Cleaning Service

Property owners can help make the job safer and more efficient by moving vehicles, patio furniture, planters, and loose items out of the work area before the crew arrives. Close windows, keep pets indoors, and let the cleaning team know about delicate plants, drainage concerns, exterior electrical features, or surfaces with existing damage.

It is also helpful to be specific about your priorities. If a rust stain near the entry, a slippery pool-deck section, or a stained storefront is the main concern, point it out before work starts. A professional can explain what treatment is appropriate, what results are realistic, and whether a lower-pressure or specialized approach is needed.

A clean exterior is one of the most visible forms of property maintenance. When pressure washing is matched to the surface, the stain, and the access challenge, it does more than remove dirt. It helps your home, community, or business look cared for from the moment someone arrives.

When Wood Floor Refinishing Is the Right Move

A hardwood floor can make a Palm Beach County home, condo, or commercial space feel finished and well cared for. But when the surface is dull, scratched, faded near windows, or showing dark water marks, routine cleaning will not bring it back. Wood floor refinishing removes the worn surface layer and creates a fresh protective finish, giving the room a visible reset without replacing the entire floor.

The right approach depends on what is underfoot. Some floors need a full sanding and refinishing process. Others may only need a lighter screen and recoat. And some damaged engineered floors are better served by repair or replacement. A professional evaluation prevents a costly mistake and helps protect the character and value of your property.

What Wood Floor Refinishing Actually Fixes

Refinishing addresses wear in the finish and, when sanding is appropriate, shallow damage in the wood itself. It is often the best option for solid hardwood floors that still have good structural integrity but no longer look their best.

Homeowners commonly call for help after years of foot traffic, pets, moving furniture, or sun exposure have left the floor uneven in color and sheen. In South Florida, humidity also plays a role. Wood naturally expands and contracts as moisture levels change. Entryways, sliding doors, kitchens, and areas near leaks can show wear sooner than the rest of the home.

A refinishing service may improve scratches, dullness, light stains, small dents, uneven color, and worn polyurethane. It can also remove an outdated amber-toned finish and replace it with a clearer, more current look. The result should not look artificially coated or overly glossy. It should look clean, protected, and appropriate for the wood species and the space.

Refinishing cannot solve every problem. Boards that are deeply warped, loose, heavily rotted, or stained by long-term water damage may need repair before any finish is applied. Dark black stains from moisture can sometimes be reduced, but they do not always disappear completely. Honest expectations matter, especially when a floor has a long history.

Is Wood Floor Refinishing Better Than Recoating?

This is one of the most useful distinctions for property owners. A recoat, sometimes called a screen and recoat, lightly abrades the existing finish and applies a new topcoat. It is less invasive than full refinishing and works well when the floor is simply losing its protective layer but the color and wood surface are still in good condition.

Full wood floor refinishing goes further. The existing finish is sanded down, usually along with a thin layer of wood, before stain and protective coating are applied. This gives you more control over scratches, color, and surface inconsistencies. It also creates a more dramatic transformation.

A recoat can be a smart maintenance decision for a lightly worn floor. It is usually faster, creates less disruption, and helps extend the time before a full sanding is needed. But it will not erase deep scratches, remove major stains, or correct a floor that has become uneven in color.

Full refinishing is the stronger choice when damage reaches beyond the finish. It is also the right time to consider a color change. The trade-off is greater preparation, more labor, and time for the finish to cure properly before rugs and furniture return.

Signs Your Floor Is Ready for Refinishing

Waiting until the floor is severely damaged can make restoration more complicated. Watch for these clear signs that the finish is no longer doing its job:

  • Scratches are widespread and visible from across the room, not just in isolated spots.
  • The floor looks gray, cloudy, or dull even after professional cleaning.
  • Water no longer beads on the surface and instead darkens or soaks into the wood.
  • High-traffic paths, doorways, and sunny areas look noticeably lighter or more worn.
  • The finish is peeling, flaking, or separating around board edges.

A simple water-bead test can offer an early clue. Place a few drops of water on a clean area of the floor. If the water stays beaded, the finish may still be protecting the wood. If it quickly absorbs and darkens the surface, the floor may need professional attention. This is not a complete diagnosis, but it is a useful reason to schedule an inspection.

The Refinishing Process for a Cleaner Result

A quality result begins before the sanding equipment is turned on. The room must be cleared, and the floor should be assessed for loose boards, exposed nails, damaged transitions, old waxes, and previous coatings. Some products can interfere with adhesion, which is why using household polish or wax on a wood floor can create problems later.

Preparation and surface repairs

Minor gaps, nail holes, and damaged boards may be addressed before refinishing begins. Floor protection and dust-control measures are especially important in occupied homes, condos, and business spaces. While no sanding project is completely dust-free, professional containment and cleanup make a meaningful difference for the rest of the property.

For condominium residents and property managers, planning is equally important. Confirm building rules, elevator access, permitted work hours, and any requirements for protecting common areas. A well-organized project reduces disruption for neighbors and keeps the work moving on schedule.

Sanding, staining, and finishing

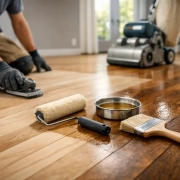
The sanding stage removes the old finish and levels surface wear. The goal is not to remove more wood than necessary. Skilled refinishing uses the correct sequence of abrasives to create a smooth, even surface without leaving swirl marks or sanding lines.

After the floor is prepared, stain may be applied if the property owner wants to adjust the color. Natural finishes remain popular because they keep the original grain visible and often make rooms feel brighter. Dark stains can look striking, but they may show dust, scratches, and pet hair more readily. Medium tones are often a practical balance for active households and rental properties.

The final protective coat has a major effect on appearance and maintenance. Matte and satin finishes hide everyday marks better than high gloss, which reflects more light but can reveal scratches and footprints. For many South Florida homes, a durable low-sheen finish offers the clean look people want with less day-to-day frustration.

Curing time is not optional

A floor can feel dry before it is fully cured. Light foot traffic may be allowed after a short period, depending on the finish, but furniture, area rugs, and heavy use should wait until the coating has hardened as recommended. Rushing this stage can leave impressions, reduce durability, or cause rugs to stick to the finish.

Can Every Wood Floor Be Refinished?

Solid hardwood can usually be refinished several times over its life, provided enough wood remains above the tongue-and-groove joint. Engineered wood is different. It has a real wood veneer over a layered base, and that veneer varies in thickness. Some engineered floors can be lightly sanded once or more, while others are too thin for traditional refinishing.

Laminate and luxury vinyl plank are not wood floors and cannot be refinished in the same way. Their printed or factory-wear layers cannot be sanded without damage. This is why identifying the floor material before making a decision is essential.

Older floors deserve special care as well. They may have beautiful grain and can often be restored impressively, but repairs, moisture issues, and previous refinishing work need to be considered first. The best recommendation is not always the biggest project. It is the one that protects the floor for the longest practical period.

Keeping a Refinished Floor Looking Its Best

Once the floor is restored, simple habits help preserve it. Use felt pads under furniture, place mats at exterior doors, clean spills quickly, and avoid soaking the floor with water. Sweep or vacuum with a hard-floor setting regularly so grit does not act like sandpaper under shoes.

Choose cleaning products made specifically for the floor’s finish, and skip steam mops, oil soaps, waxes, and harsh all-purpose chemicals unless the finish manufacturer specifically approves them. In humid months, consistent indoor climate control can also help limit excessive movement in the wood.

The Cleaners Drones approaches floor restoration with the same practical focus used across South Florida properties: assess the material, protect the space, and deliver a result you can see. When wear starts to distract from an otherwise well-kept room, a timely professional assessment can keep a beautiful wood floor in service for years to come.

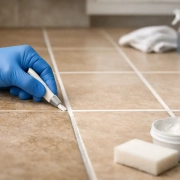
Tile Grout Color Sealing Restores Worn Floors

A tile floor can be freshly mopped and still look dirty when the grout lines are dark, blotchy, or permanently stained. Tile grout color sealing addresses that problem at its source, restoring a consistent grout color while creating a protective finish that makes future cleanup easier. For South Florida homes, condos, restaurants, and common areas, it can dramatically improve the appearance of a room without the cost and disruption of replacing tile.

What Tile Grout Color Sealing Actually Does

Grout is porous. Over time, it absorbs soil, spills, cleaning residues, oils, soap film, and moisture. In kitchens, that often means dark paths in front of the sink, range, and refrigerator. In showers and bathrooms, the issue can be mildew staining, mineral buildup, and discoloration around the perimeter of the room. High-traffic condo corridors and commercial entryways collect a different mix of dirt and moisture, but the visual result is much the same: tile that looks worn well before the tile itself has reached the end of its life.

Color sealing is not simply applying a clear sealer over the existing grout. A professional-grade grout color seal is a pigmented coating designed to bond to cleaned grout lines. It covers stubborn discoloration, evens out inconsistent color, and adds a protective barrier over the grout surface.

The difference is visible right away. Instead of highlighting every darkened grout line, the floor has a uniform, maintained appearance. Because the sealer limits absorption at the surface, routine cleaning is less likely to drive soil deeper into the grout.

Why Clear Sealer Is Not Always Enough

Clear penetrating sealers can be useful on new or lightly used grout. They help reduce absorption while preserving the grout’s original appearance. But they cannot hide an existing stain, correct faded sections, or make mismatched repair areas blend in.

Tile grout color sealing is the better option when the grout is structurally sound but no longer looks clean after professional cleaning. It is especially effective when grout has uneven coloring from years of traffic, harsh cleaners, previous spot treatments, or grout repairs that do not match the original installation.

That said, color sealing is not a fix for every grout problem. Cracked, loose, crumbling, or missing grout should be repaired before sealing. Grout lines that repeatedly crack may point to tile movement, a subfloor issue, or an expansion-joint problem. Covering that damage with color seal will not make the underlying issue disappear.

The Visible Benefits for South Florida Properties

South Florida floors work hard. Sand, rainwater, humidity, pool traffic, pets, and frequent entertaining can quickly dull grout in both residential and commercial settings. A color-sealed floor is easier to keep presentable, which matters when a property needs to make a strong first impression.

For homeowners, the benefit is often a kitchen, bathroom, or living area that looks cleaner without a renovation project. For HOA boards and property managers, restored tile and grout can improve common-area appearance while avoiding the noise, mess, and downtime associated with tile replacement. Business owners can refresh restrooms, dining areas, lobbies, and entryways with far less disruption than a new flooring installation.

Color sealing can also create a more intentional design. A light grout color can brighten a space, while a medium gray or taupe can offer a practical, modern look that hides day-to-day traffic better. The right choice depends on the tile, the room, lighting, and the amount of use the floor receives.

How the Tile Grout Color Sealing Process Works

The quality of the preparation determines the quality of the finished result. Applying a color seal over dirty grout, soap residue, or a failing previous coating can leave uneven adhesion and shorten the life of the treatment.

A professional process begins with an inspection of the tile, grout condition, traffic patterns, and any problem areas. This helps identify cracked grout, loose tile, efflorescence, heavy mineral deposits, and old topical products that may need special attention. The technician should also confirm that the tile itself is compatible with the cleaning method and color seal being used.

Next comes deep cleaning. Professional equipment and grout-specific cleaning solutions lift embedded soil from the grout lines and tile surface. In bathrooms and showers, this may include addressing soap film, mildew staining, and mineral buildup. In kitchens, the focus is often oils and tracked-in soil. The floor is then thoroughly rinsed and allowed to dry as needed.

Once the grout is clean and stable, the color seal is applied carefully to the grout lines. Excess material is removed from the face of the tile before it dries. This step requires patience and close attention, particularly with textured tile, narrow joints, natural stone, or tile that has a matte finish.

After curing, the grout should have a consistent color and a more protected surface. A skilled technician will review the finished area for missed spots, uneven coverage, or residue before returning the space to normal use.

When Color Sealing Is a Good Fit

Color sealing is often a smart choice for ceramic or porcelain tile with cement-based grout in kitchens, bathrooms, foyers, laundry rooms, and common areas. It is particularly valuable when the tile is in good condition but the grout makes the entire surface look aged.

Before moving ahead, consider four practical factors:

  • The grout should be intact, firmly bonded, and free of persistent cracking.
  • Moisture problems should be corrected first, especially around showers, toilets, exterior doors, or slab areas.
  • Natural stone, unglazed tile, and very textured surfaces require material-specific testing and care.
  • The selected grout color should work with the room’s lighting, tile pattern, and expected traffic.

Shower walls deserve special attention. Color sealing can improve the appearance and cleanability of grout, but it is not a substitute for correcting failed caulk, leaking plumbing, damaged waterproofing, or chronic moisture behind the tile. A reliable assessment should distinguish a cosmetic grout issue from a water-management issue.

Choosing the Right Grout Color

Matching the original grout color is a common choice, especially when the goal is to make the floor look newly cleaned rather than redesigned. A close match preserves the existing tile pattern and can make repairs disappear into the surrounding grout.

A color change can be equally effective. Light grout can make a room feel brighter but may show dirt faster in busy entryways or homes with pets. Darker grout offers contrast and can be more forgiving in high-traffic locations, though it may make a small room feel more defined or visually busy. Mid-tone gray, beige, and taupe shades are often practical choices for Palm Beach County properties because they balance a clean appearance with everyday wear.

A small test area is worthwhile whenever possible. Grout color can look different once it dries and can shift depending on daylight, interior lighting, and the surrounding tile.

Keeping Color-Sealed Grout Looking Its Best

Color sealing reduces maintenance, but it does not eliminate it. Regular sweeping or vacuuming prevents gritty sand from wearing on the floor. For mopping, use a neutral cleaner recommended for tile and grout, rather than bleach-heavy products, acids, or harsh abrasive powders that can dull the finish over time.

Wipe spills promptly, especially cooking oils, hair dye, cosmetics, wine, and pet accidents. In showers, reducing standing water and using proper ventilation helps limit soap residue and moisture-related staining. Avoid steam cleaning or aggressive scrubbing until you have confirmed that the method is appropriate for the specific grout coating and tile.

A professional maintenance plan may be useful for large common areas, restaurants, and rental properties where floors receive constant use. Routine cleaning helps preserve the finish and makes it easier to spot grout repairs or moisture issues before they become larger problems.

Why Professional Application Matters

DIY grout color products can seem straightforward, but the work is detail-sensitive. Uneven preparation, the wrong product, poor color selection, or seal residue left on tile can create a result that is difficult to correct. This is not just a matter of making grout look darker or lighter. It requires matching cleaning methods and coatings to the specific tile, grout, and condition of the surface.

The Cleaners Drones approaches tile and grout restoration with the same focus used across residential and commercial cleaning: identify the surface, clean it thoroughly, and choose a process that delivers a visible, durable improvement. That matters in a home where every room should feel cared for, and in a managed property where appearance affects residents, guests, and tenants every day.

When tile is worth keeping but grout is holding the room back, color sealing offers a practical middle ground between repeated scrubbing and full replacement. Start with an honest inspection, address any repairs or moisture concerns first, and let the condition of the floor guide the right solution.

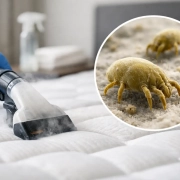
Mattress Cleaning for Dust Mites: What Works

A mattress can look clean while holding the dust, skin flakes, and moisture that dust mites feed on. That is why mattress cleaning for dust mites is less about making the bed look better and more about reducing the allergens that can affect sleep, allergies, asthma, and morning congestion.

For Palm Beach County homes, humidity makes the job more challenging. Warm, humid air creates conditions dust mites prefer, especially in bedrooms with limited airflow, heavy bedding, pets, or upholstered headboards. A routine that controls moisture and removes allergen buildup can make a noticeable difference, but it needs to be the right routine for the mattress material.

What Dust Mites Leave Behind

Dust mites are microscopic pests that feed primarily on shed skin cells. They do not bite people, and seeing no visible bugs does not mean the mattress is free of allergen triggers. The bigger concern is the proteins found in mite waste and body fragments. These particles can become airborne when you move in bed, change sheets, or vacuum nearby.

For people with allergies or asthma, exposure may contribute to sneezing, itchy eyes, coughing, a stuffy nose, or symptoms that feel worse first thing in the morning. Children, older adults, and anyone with respiratory sensitivities may be especially affected.

A mattress is not the only place mites collect. Pillows, comforters, upholstered furniture, rugs, and curtains can also hold dust. Still, the mattress deserves special attention because it is used for hours every night and absorbs body oils, perspiration, and dead skin over time.

Mattress Cleaning for Dust Mites Starts With Moisture Control

No cleaning method permanently eliminates dust mites. The realistic goal is to lower the allergen load and make the bedroom less favorable for future buildup. In South Florida, controlling indoor humidity is one of the most useful steps you can take.

Keep the bedroom well ventilated and aim for indoor humidity below 50 percent when possible. Air conditioning helps, but a dehumidifier may be worthwhile in rooms that feel damp, have musty odors, or stay closed for much of the day. Letting a mattress air out after waking up can also help. Pull back heavy bedding for a short time rather than trapping overnight moisture under layers of blankets.

Waterproof, allergen-resistant mattress and pillow encasements create an effective barrier between sleepers and the mattress core. They are particularly helpful for older mattresses that have had years to accumulate allergens. Choose covers that fully zip around the mattress, and wash them according to the manufacturer instructions.

A Practical At-Home Cleaning Routine

Regular home care can reduce surface dust and improve the condition of the bed between professional cleanings. It should be gentle. Soaking a mattress, saturating it with sprays, or using too much steam can leave moisture deep in the padding, where odors and microbial growth may become another problem.

Start by stripping the bed and washing sheets, pillowcases, blankets, and mattress protectors in hot water when the fabric care label allows it. Heat is useful for reducing mite populations in washable bedding. Dry items completely before putting them back on the bed.

Vacuum the mattress slowly using a clean upholstery attachment or a vacuum with a HEPA filter. Work across the top, sides, seams, and piping, where dust often settles. This will not reach every particle inside the mattress, but it removes loose debris from the surface and helps keep buildup from becoming heavier.

If there is a fresh spill, blot it immediately with a clean white cloth. Use only a small amount of an upholstery-safe cleaner if needed, then allow the area to dry fully before remaking the bed. Avoid heavy fragrances and harsh household chemicals, especially if someone in the household has asthma, sensitive skin, or allergies.

For most households, washing bedding weekly and vacuuming the mattress monthly is a sensible baseline. Homes with pets that sleep on the bed, allergy sufferers, frequent guests, or young children may benefit from more frequent care.

When DIY Cleaning Is Not Enough

A vacuum and clean sheets are useful maintenance tools, but they cannot fully address what has settled below the surface over months or years. Professional mattress cleaning is often the better choice after an illness, a pet accident, a major spill, a move, or a long period without deep cleaning.

It is also worth scheduling service if the mattress has persistent odors, visible staining, a dusty smell when bedding is moved, or symptoms that consistently improve away from home. Those signs do not automatically mean dust mites are the only issue. Body oils, bacteria, moisture, pet dander, and old spills can all be part of the problem.

A professional should inspect the mattress construction before selecting a method. Memory foam, pillow-top, hybrid, latex, and traditional innerspring mattresses do not respond the same way to moisture, extraction, heat, or cleaning solutions. The safest process uses controlled application, thorough soil removal, and proper drying rather than a one-size-fits-all approach.

The Cleaners Drones provides detailed interior cleaning for South Florida homes and properties, including mattress cleaning designed to refresh heavily used sleeping surfaces without unnecessary saturation. The goal is a cleaner, more comfortable bed and a process matched to the material in front of us.

What to Expect From Professional Mattress Cleaning

The right cleaning appointment should begin with a close look at the mattress, including its fabric, age, stains, odors, and prior damage. This helps identify whether cleaning is appropriate or whether a damaged mattress may need replacement. For example, a mattress with widespread mold, deep urine contamination, or significant water damage may not be a good candidate for restoration.

A professional process commonly includes targeted vacuuming, treatment for stains or odors where appropriate, and deep cleaning methods suited to the fabric and fill. Drying time varies. A lightly cleaned mattress in a climate-controlled room may be ready sooner than a thick pillow-top mattress with multiple treated areas. Good airflow and air conditioning can speed drying, while a humid room can extend it.

Be cautious of promises to make a mattress completely sterile or permanently dust-mite-free. Those claims oversimplify the issue. A quality service reduces accumulated soil and allergens while helping you reset the mattress care routine. Ongoing bedding care and humidity control are what help preserve the result.

Do Not Forget the Rest of the Bedroom

Cleaning only the mattress can leave other allergen reservoirs untouched. If allergy symptoms persist, look at the whole sleep environment. Pillows should be washed or replaced according to their care labels, and decorative pillows, duvets, bed skirts, and upholstered headboards should not be ignored.

Four areas often need attention at the same time:

  • Area rugs and carpet near the bed, which can hold dust and pet dander
  • Upholstered chairs, benches, and headboards that collect skin cells and hair
  • Window treatments that trap dust, especially in rooms kept closed
  • HVAC filters and vents that affect the air circulating through the bedroom

This does not mean every bedroom needs a full cleaning project at once. Prioritize the areas with the most use, visible dust, pet exposure, or odor. For a condo, rental turnover, or family home with recurring allergy concerns, coordinating mattress, upholstery, and carpet cleaning can be more efficient than treating each item separately.

A Cleaner Bed Is a More Practical Habit

The best time to address dust-mite buildup is before the mattress develops odors, stubborn stains, or a neglected feel. Start with washable bedding, a quality encasement, controlled indoor humidity, and regular vacuuming. Then bring in professional help when the mattress needs deeper attention or the bedroom is contributing to ongoing allergy concerns.

A clean mattress cannot promise perfect sleep, but it can remove one more source of dust and discomfort from the room where your family spends every night. If the bed no longer feels as fresh as it should, a material-safe deep cleaning is a practical place to start.

Upholstery Cleaning for Pet Odors That Works

A sofa can look clean and still announce that a pet lives there the moment someone sits down. In South Florida, heat and humidity can make that problem more noticeable, especially when urine has reached the cushion filling or a damp spot was cleaned only at the surface. Effective upholstery cleaning for pet odors is not about covering the smell with fragrance. It means finding where the odor is trapped, treating the source safely, and drying the fabric thoroughly.

For homeowners, condo residents, and property managers, the difference matters. A fresh-smelling living room feels more comfortable for family, guests, buyers, tenants, and anyone walking into the property. More importantly, the right cleaning process protects the fabric and avoids the residue, overwetting, and recurring odors that rushed DIY attempts can leave behind.

Why Pet Odors Keep Coming Back

Pet odors are usually a source problem, not an air problem. Urine can travel through upholstery fabric, into the foam, and sometimes to the decking or frame beneath it. As moisture rises in the room, odor-causing compounds can become active again. That is why a chair may smell fine after cleaning but develop a familiar odor on a humid afternoon.

Dander, body oils, saliva, and damp fur can also build up gradually. This is common on the favorite end of a sectional, pet beds placed on upholstered furniture, and dining chairs where a dog rests its head. These soils do not always create a visible stain, but they can leave fabric looking dull and smelling stale.

The material of the furniture changes the approach. Synthetic microfiber often tolerates a different method than cotton, linen, velvet, wool, or delicate blends. Loose cushions may be treatable on both sides, while attached cushions require careful moisture control. Leather needs its own cleaning and conditioning process. A one-size-fits-all cleaner can create water rings, texture changes, color loss, or a longer drying time without solving the odor.

Upholstery Cleaning for Pet Odors Starts With Inspection

Professional results begin before any cleaning solution is applied. A technician should identify the upholstery fiber, inspect seams and cushion construction, and look for signs that a pet accident has moved below the surface. UV inspection can help locate some urine contamination that is not obvious in normal light, although it is one part of the assessment rather than a guarantee that every spot will fluoresce.

The technician also needs to separate old contamination from general pet-related soil. A couch that smells like wet dog may need a deep fabric cleaning and extraction. A cushion with repeated urine accidents may need targeted odor treatment, more time to dwell, and treatment beneath the fabric. If contamination has reached the cushion core extensively, cleaning can improve the situation, but replacing the foam may occasionally be the more dependable choice.

That honest diagnosis is valuable. It prevents a customer from paying for a surface refresh when the real issue is deeper in the furniture.

The Right Treatment Targets Odor-Causing Residue

For urine-related odors, enzyme or bacteria-based treatments are commonly used to break down the organic residue responsible for the smell. The treatment must contact the affected material at the level where the contamination exists. Spraying a light mist on the top of a cushion will not reach a problem that has soaked through to the foam.

After appropriate dwell time, the upholstery is cleaned using a method suited to the fabric. Depending on the piece, that may involve low-moisture cleaning, controlled hot-water extraction, or another manufacturer-approved process. The goal is to lift soil and cleaning residue while keeping moisture exposure controlled.

A deodorizer may be used as a finishing step, but it should not be the entire strategy. Heavy fragrances can mask an odor temporarily and make it harder to tell whether the source was removed. The best result is furniture that smells neutral and clean after it dries, not furniture that smells strongly perfumed.

Drying Is Part of the Job

In Palm Beach County and throughout South Florida, humidity can slow drying and give odors an opportunity to linger. Proper airflow and moisture control are essential after upholstery cleaning. Cushions should be positioned to allow air to circulate, and the room should remain ventilated or air-conditioned when possible.

Most professionally cleaned furniture dries within several hours, but the timeline depends on the fabric, cushion thickness, level of contamination, and indoor humidity. A deeply treated foam cushion can take longer than a lightly cleaned dining chair. Avoid putting cushions back into closed covers, placing blankets over them, or allowing pets to use the furniture before it is fully dry.

What to Avoid Before the Odor Gets Worse

It is understandable to reach for a household cleaner after an accident, but some common tactics create bigger problems. Over-saturating a cushion with water can push urine farther down. Using harsh chemicals or too much soap can damage fibers and leave a sticky residue that attracts soil. Steam applied without a material-specific plan may set certain stains or add excessive moisture.

Avoid mixing cleaning products, particularly if bleach, ammonia, or strong disinfectants are involved. Besides the potential for fabric damage, mixed chemicals can create unsafe fumes. If you do use a pet-safe spot treatment, blot rather than scrub, use only the recommended amount, and allow the area to dry completely.

For a fresh accident, act quickly. Blot up as much moisture as possible with clean white towels, working from the outside of the spot toward the center. Do not press so hard that you force liquid deeper into the cushion. Then arrange professional evaluation if an odor remains, the stain returns, or the accident soaked through the upholstery.

When Professional Cleaning Makes Sense

Professional upholstery care is especially worthwhile when the odor returns after DIY cleaning, a pet has had more than one accident in the same location, or the furniture is high-value, delicate, or difficult to replace. It is also a practical service before listing a home, welcoming a new tenant, moving into a condo, or preparing a property after a pet-owning occupant moves out.

For property managers and HOA communities, odor issues can affect resident satisfaction and turnover readiness. Addressing upholstered lobby seating, clubhouse furniture, model-unit pieces, or tenant-provided remediation needs with the right process helps maintain a clean, well-managed impression without unnecessary disruption.

The Cleaners Drones approaches interior cleaning with the same attention to detail used across its South Florida cleaning and restoration services. The focus is on a clear assessment, material-appropriate methods, and visible improvement without treating every piece of furniture as if it is made from the same fabric.

Keep Furniture Fresher Between Appointments

Regular maintenance makes deep odor treatment less likely to be needed. Vacuum upholstered furniture weekly with an upholstery attachment, including under loose cushions and along seams where hair and dander gather. Wash pet blankets regularly and keep them on a designated spot instead of allowing oils and fur to spread across the entire sofa.

If your pet favors one chair or section of the couch, consider a washable cover designed for that piece. This is not the most decorative choice for every room, but it can be a smart trade-off in homes with puppies, senior pets, or animals still adjusting to a new routine. Fabric protection can also help with future spill response, though it does not make upholstery immune to repeated accidents or eliminate the need for prompt cleanup.

When accidents happen more frequently, the long-term solution may include a veterinarian visit, more frequent walks, a refreshed litter box routine, or changes to where the pet sleeps. Cleaning resolves the residue in the furniture. Preventing the next incident protects the result.

A clean sofa should feel welcoming at close range, not just look acceptable from across the room. If a cushion still carries an odor after it dries, treat that as useful information: the source may be deeper than a surface cleaner can reach, and it is time for a more precise solution.