
Aerial Facade Cleaning Review for South Florida

A boom lift parked at the entrance, blocked parking spaces, and weeks of work around residents are familiar concerns for many South Florida properties. This aerial facade cleaning review looks at whether drone-powered exterior cleaning is a practical alternative for condos, HOAs, commercial properties, and multi-story homes that need a cleaner exterior without a major access operation.

Drone cleaning is not simply a new way to spray a building. When it is planned correctly, it is a low-pressure cleaning method designed to reach elevated exterior surfaces while keeping workers off suspended platforms, scaffolding, and lifts. The result can be a noticeable improvement in curb appeal with fewer interruptions to residents, tenants, customers, and day-to-day property operations.

What an Aerial Facade Cleaning Review Should Cover

The best reviews of aerial facade cleaning do more than show before-and-after photos. They explain what surface was cleaned, what type of staining was present, how the crew protected the property, and whether the method suited the building material.

South Florida exteriors face a demanding mix of moisture, heat, windblown debris, salt air near the coast, algae, mildew, and pollution. On stucco, painted masonry, siding, metal panels, and many glass-adjacent facade areas, this buildup can make a well-maintained property look neglected long before there is a structural problem.

A professional aerial cleaning assessment should identify whether the discoloration is organic growth, dirt, oxidation, rust staining, irrigation overspray, or another issue. Each calls for a different approach. Algae and mildew may respond well to an eco-conscious cleaning solution and controlled low-pressure rinse. Oxidation, failing paint, damaged sealant, or deep mineral staining may need specialized restoration work beyond a standard exterior wash.

That distinction matters. A good contractor does not promise that every stain will disappear after one visit. Instead, they explain the expected visual improvement, test the cleaning process where appropriate, and use the lowest effective pressure for the surface.

How Drone Facade Cleaning Works

A cleaning drone carries a controlled spray system to the building elevation while trained technicians operate the equipment from the ground. The crew follows a planned cleaning pattern, applying solution and rinsing away buildup in sections. Ground personnel manage hoses, protect landscaping and entry areas, and watch for runoff or conditions that require adjustments.

The main benefit is access. Traditional high-rise or multi-story cleaning often requires a lift, rope-access team, suspended platform, or scaffolding. Those methods still have a place, especially when a building needs hands-on repair, window sealing, painting, or close inspection of physical damage. But for routine washing of hard-to-reach exterior surfaces, drone access can reduce much of the equipment and setup involved.

Low-pressure application is another meaningful advantage. Many property owners hear “pressure washing” and picture an aggressive stream that can scar stucco, force water behind siding, or disturb aging paint. Aerial facade cleaning should be tailored to the material and condition of the exterior. The goal is to treat the buildup and rinse it away, not blast the surface.

For properties with active entrances, landscaped common areas, pool decks, or limited parking, less ground equipment can also mean a cleaner jobsite. Access routes can remain more open, and residents are less likely to spend days working around large machinery.

Where Aerial Cleaning Delivers the Most Value

Drone cleaning is especially useful where height, access, and disruption are the biggest challenges. A mid-rise condominium with narrow drive lanes, for example, may have limited space for lifts. An HOA may want to clean upper elevations without closing shared parking areas. A commercial operator may need exterior maintenance completed while keeping customer access available.

It can be a strong fit for:

  • Condominium and apartment building facades
  • HOA common buildings, entry features, and multi-story residences
  • Office buildings, retail centers, hotels, and mixed-use properties
  • Upper-story stucco, masonry, siding, and exterior wall surfaces
  • Properties where scaffolding or lift placement would create major disruptions

The financial value depends on the property. A low, open building may be easy to clean with conventional ground-based equipment, so a drone may not offer a significant advantage. On taller buildings or sites with difficult access, avoiding lift rentals, prolonged setup, blocked areas, and complex staging can change the equation.

Aerial cleaning is also valuable from a planning standpoint. Property managers and boards can schedule visible exterior maintenance with less impact on residents. That makes it easier to protect the appearance of the community before staining becomes severe and more difficult to remove.

Safety and Site Control Matter as Much as Technology

The drone is only one part of a safe facade cleaning project. The company behind it must have a clear process for site evaluation, weather monitoring, controlled work areas, trained operators, and surface-specific cleaning methods.

Wind and rain can affect aerial operations, so timing matters in South Florida. A responsible crew will postpone or adjust work when conditions do not support controlled cleaning. This is not a drawback unique to drones. Lifts, scaffolding, rope access, and exterior coating projects all depend on weather. The difference is that aerial crews can often mobilize with less equipment once a suitable weather window is available.

Property protection also deserves attention. Before cleaning begins, crews should identify sensitive landscaping, electrical fixtures, outdoor furniture, entryways, vehicles, and pedestrian areas. They should establish a work zone and communicate with onsite management about access, parking, and resident notices.

For buildings with visible cracks, loose cladding, damaged caulking, open joints, or peeling coatings, cleaning should not be used to hide a maintenance issue. Those conditions may require repair first. In fact, a facade wash can help reveal areas that need attention by removing the grime that has been covering them.

The Trade-Offs Property Owners Should Know

Aerial facade cleaning is effective, but it is not the answer to every exterior problem. It cannot replace hands-on work where a technician must scrape, repair, seal, repaint, or physically inspect a surface at close range. Heavily oxidized metal, stubborn rust streaks, deteriorated coatings, and construction residue may require additional services.

There are also operational considerations. The work area needs to be managed, exterior windows and doors should be secured, and residents may need advance notice. While drone cleaning reduces disruption compared with many access systems, it does not mean no preparation is required.

The most useful question is not, “Can a drone clean this building?” It is, “Is drone cleaning the safest and most efficient way to get the result this building needs?” The answer depends on elevation, surface material, staining, property layout, weather, and the scope of the maintenance plan.

Questions to Ask Before Scheduling

Before choosing an aerial cleaning provider, ask how they determine the right pressure and solution for your facade. Ask whether they inspect the building for pre-existing damage, how they protect landscaping and common areas, and what weather conditions could affect the schedule.

It is also reasonable to ask what results are realistic for your specific staining. A provider should be clear about the difference between organic buildup that can be cleaned and permanent discoloration caused by oxidation, paint failure, or surface damage.

For HOA boards and property managers, request a clear scope of work that identifies the elevations to be cleaned, site-access needs, resident communication expectations, and any areas that may require separate restoration. This creates fewer surprises once the project starts.

A Practical Choice for South Florida Properties

For the right building, drone-powered cleaning turns an exterior maintenance problem into a manageable service visit. The Cleaners Drones combines aerial access with the careful, material-aware approach property owners expect from a professional cleaning company. That means focusing on the visible transformation while respecting the people, landscaping, vehicles, and operations below.

A clean facade does more than improve a first impression. It helps a property look actively cared for, supports resident and tenant confidence, and gives owners a clearer view of the exterior condition. If upper-level staining is growing while access equipment feels like the bigger headache, a professional aerial evaluation is a sensible place to start.

Commercial Facade Maintenance Guide for South Florida

A clean facade does more than improve curb appeal. It protects the building materials beneath it, supports tenant and resident confidence, and helps property managers catch small exterior issues before they become expensive repairs. This commercial facade maintenance guide is built for South Florida properties, where salt air, humidity, rain, algae, and strong sun can quickly change the condition of a building exterior.

For commercial buildings, condominiums, HOAs, and multi-story properties, the challenge is not simply deciding to clean. It is choosing a maintenance approach that protects the facade, keeps people safe, and does not turn the property into a long-term work zone.

Why Facade Maintenance Matters in South Florida

South Florida weather is demanding on exterior surfaces. Humidity feeds algae, mildew, and organic growth. Wind-driven rain carries dirt into joints, ledges, and textured finishes. Near the coast, salt residue can collect on glass, metal, railings, concrete, and painted surfaces. UV exposure can also reveal fading, chalking, and stains that may have been less visible months earlier.

When buildup is left in place, the issue is not always cosmetic. Algae and mildew can hold moisture against a surface. Mineral deposits can dull glass and metal. Pollutants and salt can contribute to corrosion on susceptible materials. On a property with tenants, residents, customers, or prospective buyers coming through every day, a streaked or neglected facade also sends the wrong message about how the building is managed.

Regular cleaning gives your maintenance team a clearer view of the property. Hairline cracks, failing sealant, rust marks, damaged paint, and drainage problems are easier to spot when they are not hidden behind grime.

Start With the Facade Material, Not the Stain

The right cleaning method depends on what your building is made of. A process that works well on concrete may be too aggressive for painted stucco, anodized aluminum, decorative stone, or older sealant joints. Before scheduling exterior cleaning, identify the major facade materials and any areas with known damage or repairs.

Painted stucco is common across South Florida and often develops dark algae streaks, especially on shaded elevations. It generally benefits from controlled, low-pressure cleaning and appropriate cleaning solutions rather than high pressure that can scar the finish or drive water into cracks.

Concrete and masonry can tolerate more cleaning force in some cases, but age, porosity, coatings, and mortar condition still matter. Natural stone needs special care because the wrong chemical can etch, discolor, or weaken its finish. Metal panels, window frames, and railings require a method that removes salt and grime without leaving residue or damaging protective coatings.

Glass also deserves its own plan. Exterior cleaning may remove surface dirt, but hard-water spotting, construction debris, sealant residue, or damaged glazing can require different treatment. A qualified provider should explain what cleaning can improve and what may be permanent surface damage.

Build a Practical Inspection Schedule

A full cleaning schedule works best when it is supported by shorter visual inspections. Property managers and HOA boards do not need to diagnose every issue themselves. They do need a routine that helps them notice changes early and document them.

For most South Florida commercial and multifamily properties, inspect the facade at least quarterly and after major storms. Walk the property perimeter, view upper elevations from several angles, and take dated photos of areas that need attention. Pay close attention to:

  • Green, black, or orange growth on stucco, concrete, awnings, and shaded walls
  • Rust streaks below railings, fasteners, AC equipment, or metal features
  • Cracks, peeling paint, loose sealant, and moisture staining around windows
  • Dirty runoff patterns beneath rooflines, balconies, drains, and scuppers
  • Areas where landscaping, irrigation, or pool chemicals repeatedly affect walls

This record helps separate a recurring cleaning problem from a building-envelope problem. For example, a wall that becomes stained shortly after cleaning may have a drainage issue above it. Repeated rust marks may point to corroding hardware. Cleaning restores the appearance, but the underlying cause may need a contractor, roofer, engineer, or building maintenance professional.

Choose Cleaning Frequency Based on Exposure

There is no single correct interval for every facade. A low-rise office building farther inland may need a thorough exterior cleaning once a year. A coastal condominium, hotel, medical facility, or retail center with shaded elevations may need service every six months, with targeted touch-ups in between.

The most useful question is not, “How long has it been?” It is, “What is the facade exposed to?” Coastal salt, nearby construction dust, heavy tree cover, irrigation overspray, high traffic, and persistent shade all shorten the time between cleanings. Buildings with smooth, light-colored finishes may show stains sooner than darker or more textured surfaces, even when the underlying buildup is similar.

A planned schedule is usually less disruptive and more cost-effective than waiting until staining is visible from the street. It also allows the cleaning provider to coordinate around tenant activity, resident access, deliveries, events, and weather conditions.

Use Low Pressure Where the Surface Calls for It

High pressure has a place in exterior maintenance, particularly on durable ground-level concrete and hardscape. But it is not automatically the best choice for the building facade itself. Excess pressure can damage coatings, force water behind vulnerable joints, roughen softer finishes, and make existing defects worse.

For many multi-story facades, low-pressure cleaning paired with surface-appropriate, eco-friendly solutions is the safer approach. The cleaning solution does the work of loosening organic growth and embedded grime, while controlled rinsing removes it without treating the wall like a driveway.

This is especially relevant for stucco, EIFS, painted surfaces, older masonry, decorative features, and window-adjacent areas. The best method should be based on material condition, contamination type, access needs, and the building manufacturer’s recommendations when available.

Plan for Access, Safety, and Daily Operations

Exterior access is often the largest logistical challenge in facade maintenance. Traditional cleaning methods may involve lifts, scaffolding, rope access, sidewalk closures, parking restrictions, and extended staging. Those options can be necessary for repairs or detailed hands-on work, but they can also add cost and disruption when the job is strictly cleaning.

Drone-powered exterior cleaning offers a practical alternative for many high-rise and multi-story properties. Using a controlled low-pressure system, the cleaning operator can reach difficult elevations without placing scaffolding against the building or moving large lifts through active parking areas. That can reduce setup time, minimize disruption for residents and tenants, and limit the number of people working at height.

It depends on the site. Tight exterior spaces, delicate architectural details, severe surface damage, and repair needs may call for a different access method or a combination of methods. A responsible provider will assess the property before promising a one-size-fits-all solution.

When evaluating a facade cleaning plan, ask how the crew will protect landscaping, vehicles, entryways, outdoor furniture, pedestrians, and adjacent surfaces. Also ask how runoff will be managed and whether the cleaning products are appropriate for the property environment.

Treat Cleaning and Repairs as Connected Work

Cleaning can reveal defects, but it should not be used to hide them. If a facade has open cracks, deteriorated caulk, loose paint, spalling concrete, failing waterproofing, or active leaks, those conditions should be documented and addressed on their own schedule.

A good maintenance program separates three needs: routine cleaning, corrective repairs, and capital restoration. Routine cleaning keeps buildup from becoming a larger problem. Corrective repairs handle isolated failures such as damaged sealant or rusting components. Capital restoration addresses broader issues, such as a failing coating system or widespread concrete damage.

Keeping those categories clear helps boards and managers budget more accurately. It also prevents a cleaning crew from being blamed for conditions that were already present beneath the dirt.

Make Facade Care Part of Property Standards

The best facade maintenance plans are visible to the people responsible for the property. Keep inspection photos, service dates, cleaning methods, repair notes, and before-and-after records in one place. That history makes vendor discussions easier and gives HOA boards, owners, and asset managers better information when planning future work.

At The Cleaners Drones, exterior cleaning is approached as a property-care service, not a quick surface rinse. The goal is a cleaner building with safer access, less disruption, and careful attention to the materials that make up its exterior.

A well-maintained facade helps people feel confident before they ever step through the door. Start with a close look at the surfaces that are changing, then schedule cleaning before those changes become the building’s first impression.

How to Clean Travertine Tile Without Damage

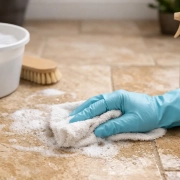
Travertine can make a Palm Beach County home, lobby, or pool area look polished and high-end, but it is not a surface that responds well to harsh cleaning shortcuts. If you are wondering how to clean travertine tile, start with one rule: treat it like natural stone, not ceramic tile. The wrong product can dull its finish, etch the surface, lighten filled areas, or leave permanent-looking marks.

Travertine is a form of limestone with natural pores, veins, and small holes. Those features give it character, but they also make it more absorbent than many other flooring materials. A consistent, gentle cleaning routine protects that investment and keeps the stone looking clean without stripping away its natural color.

What Not to Use on Travertine Tile

Acid is travertine’s biggest enemy. Avoid vinegar, lemon juice, bathroom cleaners with acidic ingredients, rust removers, and most products labeled for soap scum or hard-water deposits unless they specifically state they are safe for natural stone. Acid reacts with the calcium in travertine and causes etching – dull, rough, pale spots that are not the same as ordinary dirt.

Bleach, ammonia, abrasive powders, and stiff scrub brushes are also poor choices. They can damage the stone, weaken some grout, and leave a hazy appearance behind. Steam cleaners deserve caution, too. While they may be appropriate for certain sealed tile installations, repeated high heat and moisture can affect weak grout, loose tiles, or failing sealer. When in doubt, use a stone-safe pH-neutral cleaner and the least aggressive method that will do the job.

How to Clean Travertine Tile Step by Step

The best routine is simple. It works for most interior travertine floors, wall tile, and backsplashes, provided the stone is structurally sound and properly installed.

1. Remove loose sand and debris first

Sweep with a soft broom, use a dry microfiber mop, or vacuum with the hard-floor setting. This matters more in South Florida than many owners realize. Fine sand tracked in from driveways, pool decks, patios, and entryways acts like sandpaper under shoes and can gradually wear down a polished or honed finish.

For busy entryways and common areas, dry-cleaning several times a week is often more effective than frequent wet mopping. Place mats at exterior doors, but avoid rubber-backed mats that can trap moisture against the stone.

2. Mix a gentle cleaning solution

Fill a bucket with warm water and add a pH-neutral natural-stone cleaner according to the label. More cleaner does not mean a better result. Overmixing can leave a film that attracts dust and makes travertine look cloudy.

If you do not have a stone cleaner available, use plain warm water for a light maintenance clean. Do not substitute dish soap as a regular solution. A small amount may seem harmless, but repeated use can create a residue that dulls the stone and makes rinsing harder.

3. Mop with minimal water

Use a well-wrung microfiber mop, not a soaking-wet string mop. Travertine is porous, and excess water can settle into pits, grout lines, and unsealed areas. Clean a manageable section at a time, especially on larger floors, so moisture is not left sitting on the surface.

For wall tile or countertops, apply the cleaner with a soft microfiber cloth. Work gently in overlapping passes rather than pressing hard on one spot.

4. Rinse if the product requires it, then dry

Follow the cleaner’s instructions. Some pH-neutral products are no-rinse formulas, while others need a clean-water pass to remove residue. Either way, finish by drying the surface with a clean microfiber towel or dry mop. This step helps prevent water spots and restores the even, natural look that makes travertine stand out.

Cleaning Travertine in Showers and Bathrooms

Bathroom travertine needs a slightly different approach because soap residue, body oils, mineral deposits, and humidity build up quickly. The goal is to remove the film before it becomes a problem without using an acidic shower cleaner.

Use a stone-safe cleaner regularly, then wipe the walls, bench, and floor dry after use when practical. A squeegee on shower walls can significantly reduce soap scum and hard-water spotting. For textured travertine or grout lines, use a soft nylon brush and light pressure. Rinse thoroughly and dry the area as much as possible.

If you see white, crusty mineral deposits around fixtures or on shower walls, do not reach for vinegar. These deposits may require a specialty stone-safe product or professional restoration. Trying to dissolve them with acid can etch the surrounding tile faster than it removes the buildup.

How to Handle Spills, Stains, and Etching

Blot spills immediately instead of wiping them across the surface. Oil, wine, coffee, juice, cosmetics, and pet accidents can penetrate unsealed or worn travertine. Use a clean white cloth, then clean the area with a pH-neutral stone cleaner and dry it.

A darkened spot may be a stain, but a light dull mark is often etching. This distinction matters. Stains sit below or within the stone and may respond to a poultice or specialized stain treatment. Etching changes the surface itself and usually needs honing or polishing to blend it back in. A household cleaner will not repair it.

For a small unknown spot, test any stone-approved product in a hidden area first. If the stain is large, recurring, oily, or located in a high-visibility area, professional tile and stone restoration is usually the safer call. Aggressive scrubbing can turn one isolated issue into a larger finish problem.

Outdoor Travertine and Pool Deck Care

Travertine patios and pool decks are popular across South Florida because the stone stays comfortable underfoot and complements outdoor living spaces. They also face sunscreen, leaves, irrigation overspray, algae, mildew, and windblown grit.

Start with regular sweeping and rinsing using a garden hose. For routine cleaning, use a pH-neutral stone cleaner and a soft brush, then rinse thoroughly. Keep irrigation aimed away from the surface when possible, since repeated mineral-heavy overspray can leave deposits.

Pressure washing requires judgment. Too much pressure, a narrow tip, or cleaning too close to the surface can damage soft areas, blast out filler, roughen grout, and create uneven color. Low-pressure cleaning with the right solution is often the better method, especially around pool areas, delicate grout, and older installations. Slippery algae growth should be addressed promptly, but the cleaning process should protect both the stone and nearby landscaping.

Protecting Travertine With the Right Maintenance Plan

Most travertine benefits from a quality penetrating sealer. Sealer does not make stone stain-proof, and it does not prevent etching from acidic products. What it does is slow absorption, giving you more time to clean spills before they settle into the pores.

How often travertine needs resealing depends on its finish, location, foot traffic, moisture exposure, and the type of sealer previously used. A shower floor, busy foyer, restaurant entry, or pool deck generally needs more attention than a low-traffic interior wall. If water quickly darkens the stone instead of beading briefly on top, the sealer may be wearing down. That is a useful sign to have the surface evaluated.

Professional service is particularly valuable when travertine has deep soil in its pores, darkened grout, stubborn mineral deposits, etched patches, loose fill, or an uneven finish. The Cleaners Drones helps South Florida property owners restore tile and grout with material-appropriate methods, so the work improves the appearance without creating new damage.

A clean travertine floor should still look like stone: natural variation, soft texture, and a finish that fits the space. Gentle products, fast spill response, and less water will do more for that result than any harsh cleaner ever will.

Grout Restoration That Brings Tile Back to Life

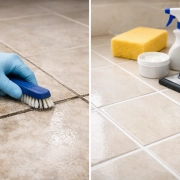
A tile floor can be scrubbed, mopped, and still look dirty because the problem is sitting between the tiles. Grout restoration addresses those dark joints, uneven color, mildew staining, and worn areas that make an otherwise solid floor look older than it is. For homes, condos, restaurants, and commercial properties across Palm Beach County, the difference can be immediate: cleaner lines, brighter tile, and a surface that looks properly maintained.

That result does not come from applying more cleaner and hoping for the best. Grout is porous, and South Florida conditions make it work harder. Humidity, sand, wet shoes, pool traffic, cooking residue, hard-water minerals, and routine foot traffic all settle into grout over time. The right restoration process depends on the tile, the grout’s condition, and whether the goal is cleaning, repair, color correction, or long-term protection.

What grout restoration actually includes

Grout restoration is more than a quick surface cleaning. It begins with identifying why the grout looks discolored. Sometimes the issue is embedded soil and residue. In bathrooms, mildew or mineral deposits may be the main concern. In kitchens, grease can leave grout looking permanently gray or yellow. Around entries, patios, and pool-adjacent areas, sand and outdoor grime can grind into the joints.

A professional process typically starts with an inspection of the tile and grout. This matters because porcelain, ceramic, natural stone, textured tile, and older installations do not all respond the same way. A cleaning method that is safe for durable porcelain may be too aggressive for certain natural stone surfaces or deteriorating grout.

After the surface is evaluated, technicians use material-appropriate solutions and controlled agitation to break up embedded contamination. Extraction removes loosened soil instead of simply spreading it across the floor. If grout has cracks, missing sections, or areas that have broken down, cleaning alone will not solve the problem. Those joints may need repair before the floor can look uniform and stay protected.

When staining remains after cleaning, grout color sealing can be an effective next step. This is not the same as applying a clear sealer. A color seal coats the grout in a consistent shade while helping reduce future absorption. It can restore a uniform appearance without the disruption and expense of replacing tile that is otherwise in good condition.

Signs your tile needs grout restoration

The most obvious sign is grout that stays dark after normal cleaning. If you have tried mopping, store-bought sprays, and repeated scrubbing without a visible change, the soil may be below the surface rather than on it.

Uneven grout color is another common issue. High-traffic paths can look darker than the rest of the room, while areas near showers, toilets, sinks, or exterior doors may show distinct staining. In many South Florida homes, tile itself holds up well while the grout becomes the weak visual point.

Pay attention to grout that feels rough, sandy, cracked, or recessed below the tile edge. Those are signs of wear, not just dirt. Water can enter compromised joints, particularly in bathrooms and other wet areas. Addressing deterioration early can help prevent a small maintenance issue from becoming a larger repair.

For property managers and HOA boards, it is also worth looking beyond individual units. Dirty grout in lobbies, corridors, restrooms, clubhouses, fitness rooms, and pool facilities affects how residents and visitors perceive the entire property. Restoring those surfaces can make a noticeable difference without taking on a full flooring renovation.

Why DIY grout cleaning often falls short

There is nothing wrong with routine grout maintenance. Regular vacuuming or sweeping, prompt spill cleanup, and a suitable neutral cleaner all help protect tile floors. The challenge starts when homeowners use harsh methods to fight stains that have been building for years.

Acidic cleaners can etch or dull certain surfaces, weaken cement-based grout, and damage nearby natural stone. Bleach may brighten a surface temporarily but does not always remove embedded residue. It can also create fumes and should never be mixed with other cleaning products. Abrasive brushes and aggressive scrubbing may wear down grout, leaving it more open to future staining.

Steam can be useful in some situations, but it is not a universal answer either. Excessive heat or moisture can be a poor fit for damaged grout, loose tile, or surfaces with existing installation issues. The right approach depends on what is on the grout and what condition the floor is already in.

Professional restoration is designed to avoid that guesswork. A trained technician can determine whether the floor needs deep cleaning, grout repair, clear sealing, color sealing, or a combination of services. That targeted approach protects the tile while focusing effort where it will produce a visible improvement.

The value of sealing after grout cleaning

Freshly cleaned grout is easier to appreciate when it stays clean longer. Because standard grout is porous, it can absorb spills, soil, moisture, and residue again if left unprotected. A quality sealer helps create a barrier, giving homeowners and cleaning staff more time to remove spills before they settle in.

Clear sealing works best when the grout has cleaned up evenly and the existing color still looks right. Color sealing is often the better option when grout is permanently discolored, blotchy, or impossible to return to a consistent shade through cleaning alone. It can also be a practical choice for a property preparing for new residents, listing a home, or refreshing a heavily used commercial space.

Sealing is not a promise that grout will never get dirty. High-traffic entries, kitchens, showers, and pool-adjacent rooms still need routine care. It does, however, make ongoing maintenance more manageable and helps preserve the restored appearance.

Grout restoration for homes, condos, and businesses

At home, restored grout can change the feel of kitchens, bathrooms, laundry rooms, living areas, and covered patios. Tile may cover a large portion of the home, especially in South Florida, so clean grout lines have an outsized effect on the room. The floor looks brighter, the tile pattern becomes clearer, and the space feels more cared for.

For condo residents and HOA communities, scheduling matters just as much as the results. Work should be planned with attention to access, building rules, resident comfort, and proper protection of nearby surfaces. A professional team can help minimize disruption while completing detailed work in individual units or shared spaces.

Commercial properties have different priorities. Restaurants, retail spaces, offices, medical facilities, and hospitality areas need floors that support a clean, professional appearance without creating lengthy closures. The best schedule may be during lower-traffic hours, and the right restoration plan should account for foot traffic, slip concerns, cleaning protocols, and the type of contamination the business deals with every day.

How to keep restored grout looking better

After restoration, the daily routine can stay simple. Sweep or vacuum grit before it gets ground into the floor, then mop with a cleaner recommended for the tile and grout. Avoid leaving standing water in bathrooms and entries, and wipe up cooking spills, pet accidents, and tracked-in dirt as soon as practical.

Skip oil-based soaps and cleaners that leave a heavy film. That residue can attract soil and make grout look dull again. If your tile has natural stone components, use products made for stone rather than assuming a standard tile cleaner is safe.

The frequency of professional maintenance depends on use. A lightly used guest bathroom may need attention far less often than a busy family kitchen, rental unit, lobby, or restaurant entry. Rather than waiting until grout is nearly black or visibly breaking down, schedule service when routine cleaning stops delivering the result you expect.

The Cleaners Drones provides tile and grout restoration with the same detail-focused approach used across its South Florida cleaning services. The goal is not to make a floor look briefly improved for a photo. It is to identify what the surface needs and deliver a clean, even result that fits the way the property is used.

If your tile still has life left but the grout is making the room look worn, restoration may be the practical middle ground between constant scrubbing and a costly replacement. A professional assessment can give you a clear answer before you spend another weekend on cleaners that cannot reach the problem.

Steam Cleaning Versus Encapsulation for Carpets

A carpet can look clean on the surface while still holding the oily residue, fine sand, pet contamination, and tracked-in moisture that make it wear out faster. When choosing steam cleaning versus encapsulation, the better option depends on what is in the carpet, how heavily it is used, and how soon people need to walk on it again. For Palm Beach County homes, condos, offices, and common areas, the right method delivers more than a brighter appearance – it helps protect the flooring investment.

Steam Cleaning Versus Encapsulation: The Core Difference

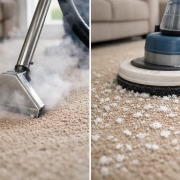
Steam cleaning is the name most people use for hot water extraction. A professional applies a cleaning solution, agitates the fibers as needed, then flushes the carpet with hot water and extracts the water, loosened soil, and cleaning residue with powerful vacuum equipment. It is a deep-cleaning process designed to remove material from the carpet rather than simply improve its appearance.

Encapsulation cleaning uses a low-moisture solution that surrounds and crystallizes dirt, oils, and residue as the carpet dries. A machine works the solution through the carpet pile. Once dry, the encapsulated soil can be removed through vacuuming, often during the same visit or in the regular maintenance vacuuming that follows.

Neither process is automatically better in every situation. Hot water extraction is generally the stronger choice for restorative cleaning, heavy soil, stains, and contaminated carpet. Encapsulation is often the practical choice for routine maintenance, commercial carpet, and spaces where fast dry times matter.

A quick correction about “steam” cleaning

Professional carpet cleaning machines do not usually blast household-style steam into the carpet. The term remains popular, but the process is typically hot water extraction. That distinction matters because the goal is controlled flushing and strong recovery, not soaking the carpet or filling the space with steam.

A trained technician adjusts water temperature, solution type, agitation, and extraction based on the carpet fiber, backing, condition, and soil level. This is especially important in South Florida, where high humidity can extend drying time if carpet is over-wet or poorly extracted.

When Steam Cleaning Is the Better Choice

Hot water extraction reaches deeper into carpet fibers and is usually the right recommendation when a carpet has not been professionally cleaned for a long time. It works well for busy family rooms, bedrooms with pet accidents, rental turnovers, and carpets that feel sticky or matted even after vacuuming.

The process is particularly effective when the problem is more than dry, loose dirt. Oils from shoes and bare feet, food residue, pet dander, beverage spills, and previous cleaning-product buildup can bond to fibers. A properly performed extraction service flushes out much of that material instead of leaving it behind.

Steam cleaning may be the best fit when you notice four common warning signs:

  • Traffic lanes look darker than the surrounding carpet.
  • The carpet has lingering odors or a tacky feel.
  • Spots return after do-it-yourself cleaning.
  • Fibers are flattened, dull, or noticeably discolored.

It is also a strong option before listing a home, after a tenant moves out, or before moving furniture into a newly purchased property. The visible difference can be substantial when the carpet has been carrying months or years of soil.

The trade-off is drying time. With good extraction and indoor airflow, many carpets dry within several hours, though conditions vary. Dense pile, heavy soil, limited air conditioning, rainy weather, and South Florida humidity can all make the process take longer. Fans, open airflow, and keeping the thermostat at a comfortable setting help the carpet dry more efficiently.

When Encapsulation Is the Smarter Choice

Encapsulation is designed for maintenance cleaning. Because it uses significantly less moisture than extraction, carpet often dries in about one to two hours. That can make a real difference in an office, retail space, condominium hallway, clubhouse, or other area that cannot be closed for most of the day.

For property managers and HOA boards, low-moisture cleaning can reduce disruption. There are fewer wet-floor concerns, less downtime for residents and staff, and a faster return to normal operations. It can be a practical way to keep common-area carpet looking consistently cared for between deeper cleanings.

Encapsulation also works well on commercial carpet tiles and low-pile synthetic carpet that receives frequent vacuuming. These materials often benefit from a scheduled maintenance program that removes dry soil regularly and addresses buildup before it turns into permanent-looking traffic lanes.

Its limitation is equally clear: encapsulation is not a substitute for a deep flush when the carpet is heavily soiled or contaminated. It may improve appearance, but it is not the preferred method for significant pet urine, heavy grease, flood-related concerns, deeply embedded grime, or substantial residue from past cleaning attempts. Those situations call for inspection and often hot water extraction or a more specialized treatment.

Dry Time Is Important, but It Is Not the Only Decision

Fast drying is valuable, especially in occupied commercial spaces and humid climates. Still, selecting a cleaning method only because it dries quickly can lead to disappointing results. A carpet with deep soil may look better after encapsulation but continue to hold material that causes odors, rapid resoiling, or fiber damage.

On the other hand, scheduling hot water extraction for every routine commercial cleaning may create unnecessary downtime. A better plan is often to use encapsulation for regular appearance management, then schedule periodic extraction to reset the carpet and remove the buildup that maintenance cleaning cannot fully address.

Think of it as maintaining a property instead of reacting to it. Frequent vacuuming, prompt spot treatment, and low-moisture maintenance help preserve the carpet between deeper professional cleanings. Periodic extraction addresses the soil that gradually works its way below the visible surface.

What South Florida Properties Should Consider

South Florida carpet faces a specific mix of challenges: humidity, sand, rainwater, pool traffic, pets, and constant use in seasonal or multi-family properties. Fine sand acts like an abrasive inside carpet fibers. It can cut and dull the pile over time, particularly near entrances, patios, elevators, and high-traffic hallways.

Humidity adds another concern. Carpet should never remain damp for an extended period. Quality equipment, thorough extraction, appropriate cleaning chemistry, and proper airflow are the difference between a controlled professional service and a carpet that feels wet long after the crew has left.

Material matters too. Synthetic carpet generally handles both methods well when cleaned correctly. Natural fibers, delicate rugs, wool, and specialty backings require a more careful evaluation. The cleaning approach should be matched to the actual material, not chosen from a one-size-fits-all menu.

For area rugs, the best solution may not be either method performed in place. Some rugs need specialized washing, controlled drying, color testing, or treatment away from the home to protect their fibers and backing.

How a Professional Chooses the Right Method

The most dependable service starts with an inspection. A technician should look at fiber type, wear patterns, visible staining, odor concerns, previous cleaning history, and the amount of time available for drying. A clean-looking carpet in a low-traffic guest room needs a different approach than a heavily used office corridor or a living room shared by children and pets.

The Cleaners Drones approaches carpet care with that practical mindset. The goal is not to push one process for every property. It is to recommend the method that produces a visible improvement while respecting the carpet, the building schedule, and the people using the space.

If the carpet needs deep flushing, hot water extraction is usually the right call. If the priority is keeping a busy area presentable with minimal downtime, encapsulation may be the more efficient choice. In many properties, the best results come from using both methods at different points in the maintenance cycle.

Before booking, consider the condition of the carpet rather than just the calendar. A quick conversation about stains, pet issues, traffic patterns, fiber type, and drying needs can prevent the wrong method from being used. The right cleaning plan should leave the carpet looking better, feeling fresher, and ready for the life happening on it.

Highrise Cleaning Without Scaffolding or Lifts

A high-rise exterior can look tired long before the building itself has a problem. In Palm Beach County, salt air, humidity, wind-driven rain, mildew, algae, and airborne debris settle onto glass, stucco, concrete, balconies, and façade details. Highrise cleaning is not just about restoring curb appeal. It is a practical part of protecting the surfaces, reputation, and day-to-day experience of a property.

For condominium boards, property managers, commercial operators, and owners of multi-story homes, the challenge has always been access. Traditional cleaning often requires lifts, scaffolding, rope crews, blocked parking areas, and extended work zones. Drone-powered exterior cleaning changes that equation by bringing controlled, low-pressure cleaning where conventional equipment is costly or difficult to use.

Why Highrise Cleaning Matters in South Florida

South Florida buildings work hard against the climate. Moisture encourages organic growth, especially on shaded elevations, rooflines, ledges, and areas beneath overhangs. Salt particles can leave a dull film on exterior surfaces near the coast. Pollen, dust, construction residue, and traffic grime add another layer that makes a well-maintained property look neglected.

Left alone, that buildup can become more than a cosmetic concern. Mold and algae may retain moisture against certain finishes. Dirt can make small cracks, staining, failed sealant, or other maintenance issues harder to spot during routine inspections. On commercial and multifamily properties, a stained exterior also affects the first impression residents, tenants, guests, and prospective buyers take from the building.

Cleaning frequency depends on the building’s location, exposure, exterior materials, landscaping, and drainage. A coastal condominium with shaded sides may need attention more often than a building farther inland with open sun and less moisture retention. The goal is not to clean on a rigid schedule for its own sake. It is to address buildup before it becomes deeply established or requires more aggressive treatment.

How Drone-Powered Highrise Cleaning Works

Drone cleaning uses an aerial platform to apply a targeted cleaning solution and rinse exterior surfaces from a safe distance. The work is typically performed with a low-pressure approach designed for the material being cleaned. That matters because high pressure is not the right answer for every façade. On stucco, painted surfaces, delicate trim, seals, and certain cladding systems, excessive pressure can force water where it does not belong or damage the finish.

A professional crew begins by evaluating the building, identifying the surface materials, noting access points, and checking for conditions that need special care. The cleaning method should account for windows, ventilation openings, balconies, electrical fixtures, landscaping, pedestrian areas, and parked vehicles below.

Once the work area is prepared, the drone gives the technician controlled access to vertical and hard-to-reach sections. Instead of building out scaffolding or moving a lift around the property, the crew can clean high elevations with fewer ground-level obstacles. The result is a more efficient process for many properties, particularly where access is limited or where a lift would disrupt residents, tenants, customers, or traffic flow.

The right cleaning solution does the heavy lifting. Eco-friendly exterior treatments can break down algae, mildew, and surface grime so they can be rinsed away at appropriate pressure. The objective is a clean, even finish without treating every surface as if it were a driveway.

What Can Be Cleaned on a Multi-Story Property?

Exterior cleaning plans should be built around the property, not a one-size-fits-all package. Many high-rise and multi-story properties need attention on a combination of façade surfaces, upper-level walls, balconies, architectural features, and difficult access areas.

Common targets include:

  • Stucco, painted concrete, and exterior masonry
  • Exterior cladding, trim, ledges, and overhangs
  • Balcony exteriors and rail-adjacent surfaces
  • Mildew- and algae-stained upper elevations
  • Multi-story residential and commercial exterior walls

Not every surface should receive the same cleaning chemistry or rinse pressure. Natural stone, aging paint, damaged stucco, wood accents, and areas with compromised caulking may require a more cautious approach. A capable provider will explain what can be cleaned safely, what may need repair first, and where expectations should be adjusted.

The Real Benefit: Less Disruption Around the Property

A clean building is valuable. A cleaning project that turns the property into a prolonged construction zone is less appealing.

Scaffolding and lifts can be necessary for certain inspections, repairs, and specialized work. There are situations where hands-on access is the only appropriate option. But for exterior washing, those methods may create avoidable complications: parking restrictions, blocked walkways, noise, resident notices, equipment staging, and longer setup times.

Drone-based cleaning can reduce many of those burdens. With no large lift traveling across the property and no scaffolding wrapped around the façade, crews can often keep common areas more accessible. That is especially useful for active condominium communities, retail sites, medical offices, hotels, and businesses that cannot afford to make a poor impression while maintenance is underway.

Reduced disruption does not mean reduced preparation. Safe service still requires a defined work perimeter, careful monitoring of weather conditions, protection for sensitive ground-level areas, and clear communication with the people who use the property. The difference is that the cleaning process can be organized around the building’s operations rather than forcing operations to stop around the equipment.

Safety Is Part of the Cleaning Plan

Highrise cleaning involves more than getting water to an upper floor. It requires planning for people, property, and changing site conditions. Wind, rain, nearby power lines, pedestrian traffic, and building geometry all affect how and when exterior work should be performed.

Professional drone cleaning helps limit the need for technicians to work from elevated scaffolding, ladders, or lifts during the wash itself. Fewer elevated access requirements can reduce risk and simplify the job site. Still, a responsible provider will not treat drone technology as a shortcut. They will use trained operators, follow site-specific safety procedures, maintain clear ground control, and postpone work when weather makes conditions unsuitable.

For HOA boards and property managers, this planning is often as important as the visible result. A low-disruption cleaning project should come with practical coordination: a site review, a clear scope of work, timing that respects residents or tenants, and realistic expectations about weather-related adjustments.

Choosing the Right Method for Your Building

The cheapest quote is not always the least expensive outcome. A cleaning method that damages paint, drives water behind a surface, misses upper-level staining, or creates major disruption can cost more in repairs and complaints than a properly planned service.

Ask how the provider will assess the exterior material and what pressure range or cleaning solution they intend to use. Confirm how they protect landscaping, windows, vehicles, and pedestrian areas. For a multi-story property, also ask how they handle difficult elevations, balconies, and areas where a lift cannot easily reach.

Experience across both exterior and interior cleaning can be an advantage. A company that understands surface-specific care is less likely to treat every cleaning problem with maximum force. The Cleaners Drones brings that practical cleaning background to drone-powered access, helping South Florida properties address high exterior surfaces without automatically resorting to scaffolding or lifts.

Keeping the Exterior Cleaner Between Services

A full exterior cleaning is more effective when basic maintenance supports it. Property staff can watch for irrigation overspray, drainage issues, standing water near walls, and landscaping that traps moisture against the building. Catching these conditions early helps slow the return of algae and staining.

After storms, it is also worth checking upper elevations and hard-to-see sections for residue, streaking, or new mildew growth. Early attention often means a more straightforward cleaning process later. For buildings near the coast, regular visual checks can help management stay ahead of salt film and weather-driven buildup.

A well-kept high-rise tells residents, visitors, and tenants that the property is being watched over. The best time to schedule cleaning is often before the stains become the first thing anyone sees.

7 Benefits of Low Pressure Washing for Properties

Salt air, humidity, tropical rain, and intense sun can make a South Florida property look older than it is. Algae streaks on stucco, black buildup on pavers, and mildew on roofs are more than cosmetic problems. One of the biggest benefits of low pressure washing is that it removes this organic growth without relying on the aggressive force that can damage sensitive exterior materials.

For homeowners, HOA boards, property managers, and commercial operators, the right cleaning method protects the property while restoring the clean, cared-for appearance people notice right away. Low-pressure washing is not simply a gentler version of conventional pressure washing. It is a material-specific cleaning process that uses the right solution, dwell time, water volume, and controlled rinsing to do the work safely.

What Low-Pressure Washing Does Differently

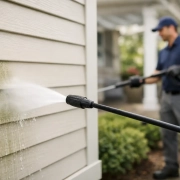
High-pressure washing depends primarily on force. On durable concrete in the right conditions, that can be effective. But many exterior surfaces across Palm Beach County are not built to withstand aggressive water pressure. Roof tiles, painted stucco, exterior trim, screens, wood, siding, awnings, and older pavers can be marked, loosened, etched, or stripped when cleaned with too much force.

Low-pressure washing, often called soft washing, uses carefully selected cleaning solutions to break down algae, mildew, mold, dirt, pollen, and other surface contamination. The surface is then rinsed at low pressure. Rather than blasting stains away, the process treats the source of the discoloration and lifts it from the material.

The best method always depends on the surface, its condition, and the type of buildup present. A driveway may need a different approach than a clay tile roof or a painted condominium exterior. That assessment is where professional experience matters.

The Benefits of Low Pressure Washing for South Florida Properties

1. It protects delicate exterior surfaces

The most practical benefit is reduced risk of damage. High pressure can chip roof tiles, scar painted surfaces, force water behind siding, remove paver sand, or damage seals and caulking. On older buildings, even a small mistake can create an expensive repair.

Low-pressure methods are designed for surfaces where preservation matters as much as appearance. When the cleaning solution is matched to the material and contamination, crews can remove buildup without turning a cleaning project into a restoration project.

2. It treats algae and mildew instead of only removing the visible layer

Florida’s warm, damp conditions encourage algae, mildew, and mold to return quickly. A force-only wash can make a surface look better for the moment while leaving microscopic growth behind in pores, seams, and textured finishes.

Low-pressure cleaning solutions are allowed to dwell long enough to break down organic contamination before rinsing. This can produce a more even result and may help surfaces stay cleaner longer than a quick, high-pressure rinse alone. Results still vary with shade, irrigation overspray, nearby trees, roof runoff, and the amount of moisture around the property, but treating the growth is a better long-term approach than simply knocking it loose.

3. It helps preserve curb appeal and property value

A clean exterior changes how a property is perceived. For a homeowner, it can make the driveway, walkways, pool deck, roofline, and exterior walls look maintained again. For a condominium community or commercial site, it supports resident confidence, tenant satisfaction, and a professional first impression.

Low-pressure washing is especially valuable when a property has highly visible surfaces that cannot be replaced casually. Restoring a clean finish to stucco, tile, pavers, or exterior cladding can make the building look cared for without the cost and disruption of premature repainting or replacement.

4. It is a safer choice for elevated and hard-to-reach areas

Exterior cleaning becomes more complicated when surfaces are several stories above ground. Traditional access methods may require ladders, lifts, scaffolding, or workers walking on roofs. Each option adds safety considerations, setup time, and disruption around the property.

For multi-story buildings and difficult exterior elevations, The Cleaners Drones can use drone-powered cleaning technology to apply eco-friendly low-pressure methods from a safer working position. This approach can reduce the need for scaffolding and lifts while allowing crews to address exterior areas that are difficult to reach with conventional equipment.

No cleaning method removes every risk, and some properties may still require ground crews or specialized access plans. But reducing unnecessary work at height is a meaningful advantage for HOAs, property managers, and commercial operators responsible for busy sites.

5. It reduces disruption around occupied properties

Large exterior projects can interfere with residents, customers, deliveries, parking, and daily operations. Scaffolding can block walkways. Lift equipment can take up parking spaces. Extended work zones can create noise and inconvenience for days.

Low-pressure washing supports a more controlled process, particularly when paired with aerial access for taller structures. Less heavy access equipment can mean fewer obstacles on-site and a cleaner workflow around entrances, pool areas, patios, and common spaces. For commercial locations, that can help maintain a more professional appearance while the work is underway.

Property managers should still plan for temporary access restrictions, overspray protection, and clear resident communication. A professional crew will identify these needs before work begins rather than treating them as an afterthought.

6. It can be a more responsible option around landscaping

South Florida landscapes often include palms, hedges, flowering plants, turf, water features, and outdoor living areas that deserve protection. The concern is not only water pressure. Cleaning products, runoff, and poor preparation can all affect surrounding plants and surfaces.

A responsible low-pressure washing process includes pre-wetting vegetation, controlling solution application, monitoring runoff, and rinsing thoroughly when the job is complete. Eco-friendly products and proper dilution matter, but so does the technician applying them. “Eco-friendly” should never be treated as a substitute for careful site preparation.

If a property has delicate landscaping, ponds, newly installed plants, or unusual exterior finishes, mention it during the estimate. Those details help determine the right cleaning plan.

7. It delivers a more even clean on textured materials

Stucco, barrel tile, travertine, pavers, and textured concrete tend to hold dirt and biological growth in uneven patterns. Excessive pressure can leave visible wand marks or clean one area more aggressively than another. It may also erode the surface over time.

With low-pressure washing, cleaning agents do more of the work across the full surface. The rinse can then remove loosened buildup more consistently, helping avoid the striped or patchy look that comes from an uneven high-pressure pass. On pavers, the process can also help preserve the joint material that keeps the installation stable.

When High Pressure May Still Be Appropriate

Low-pressure washing is not the answer for every cleaning need. Heavily stained concrete, gum removal, certain commercial loading areas, and some durable masonry surfaces may require targeted high-pressure equipment. Even then, pressure should be adjusted for the material, and the operator should understand how water flow, nozzle selection, distance, and cleaning solutions affect the result.

The point is not that more pressure is always bad. The point is that the cleaning method should fit the surface. A reputable professional does not bring one setting and one solution to every job.

What to Ask Before Scheduling Exterior Cleaning

Before choosing an exterior cleaning provider, ask how they will clean each surface, not just whether they offer pressure washing. A clear answer should cover the expected method, protection for plants and adjacent surfaces, how runoff will be managed, and whether the crew has a plan for high or difficult-to-reach areas.

It is also reasonable to ask about the condition of your surfaces. Failing paint, cracked tiles, loose pavers, deteriorated caulking, and existing leaks should be identified before cleaning begins. Cleaning can reveal issues that buildup was hiding, but it should not be used to ignore needed maintenance.

A clean property should never come at the expense of damaged finishes, disrupted residents, or unnecessary safety risks. When exterior buildup starts taking away from the look of your home, community, or business, choose a low-pressure cleaning plan built around the materials you want to protect.

How to Sanitize Upholstered Chairs Safely

A dining chair can look clean and still hold the evidence of everyday life: sunscreen after a South Florida beach day, pet dander, food spills, body oils, and humidity-related odors. Knowing how to sanitize upholstered chairs starts with treating the fabric correctly. Too much moisture, the wrong chemical, or aggressive scrubbing can leave water rings, shrink fibers, set a stain, or create conditions for mildew inside the padding.

Sanitizing is not the same as making a chair look better. A proper approach removes soil first, uses a product appropriate for the material, and dries the upholstery thoroughly. The result should be a chair that is cleaner, fresher, and ready to use without risking the fabric or the foam underneath.

Start by Identifying the Upholstery Fabric

Before applying anything, find the manufacturer’s care tag. It is usually under the seat cushion, beneath the chair, or along a skirt or seam. The cleaning code tells you how much moisture the material can handle.

A W code generally means water-based cleaning products are acceptable. S means use a solvent-based upholstery cleaner, not water. WS means either method may be suitable, while X means vacuum only and calls for professional care. If there is no tag, treat the chair cautiously and test any product on a hidden section first.

Fabric type matters as much as the code. Durable synthetic fabrics often tolerate careful water-based cleaning, but cotton, linen, velvet, silk, wool, and older upholstery can react badly to moisture or high heat. Leather and faux leather require separate cleaning methods and should never be saturated like fabric upholstery.

What Sanitizing Actually Means for Upholstered Chairs

Regular vacuuming and spot cleaning remove crumbs, dust, and visible marks. Sanitizing focuses on reducing germs on the surface, while deep upholstery cleaning also addresses embedded soil, oils, allergens, and odor-causing residue in the fibers and cushion material.

For most homes, cleaning the chair thoroughly is the first priority. A disinfectant or sanitizer cannot work well through a layer of grime. If someone in the household has been sick, if the chairs are used in a waiting room, or if there has been a pet or bodily-fluid accident, a fabric-safe sanitizing step may make sense after cleaning.

Be careful with broad claims on household products. Use only a product specifically labeled for upholstered fabric, and follow its stated contact time. Contact time is the length of time the surface must remain wet for the product to work as directed. Spraying and immediately wiping it away may provide fragrance, but not the intended sanitizing result.

How to Sanitize Upholstered Chairs Step by Step

1. Vacuum every surface before using moisture

Use an upholstery attachment to vacuum the seat, back, sides, seams, piping, and crevices. Move cushions when possible. Dry soil behaves like fine sand during cleaning, so removing it first protects the fibers from unnecessary abrasion.

For pet hair, a soft upholstery brush or rubber cleaning tool can loosen hair before vacuuming. Do not use a stiff brush on delicate weaves, velvet, or loosely woven fabric.

2. Pre-treat visible spots carefully

Address food, makeup, oils, or drink spills with an upholstery-safe spot cleaner that matches the chair’s care code. Apply the product to a clean white cloth, not directly onto the stain, unless the manufacturer directs otherwise. Blot from the outside edge toward the center.

Avoid rubbing. Scrubbing can spread the stain and distort the pile of the fabric. It can also push moisture deeper into the cushion, where drying takes much longer in humid Palm Beach County conditions.

3. Clean the upholstery with controlled moisture

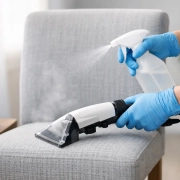
For water-safe fabric, use a lightly damp microfiber cloth or an upholstery machine with minimal moisture extraction. Work in small sections and avoid soaking the padding. The goal is to lift soil, not saturate the chair.

If you use a home upholstery machine, do not make repeated wet passes in the same area. One controlled cleaning pass followed by multiple dry extraction passes is the safer approach. A chair that feels wet beneath the surface can develop a lingering odor even when the top fabric appears dry.

For solvent-only materials, use the approved solvent product sparingly in a well-ventilated area. Keep the product away from flames, heat sources, and children. When a fabric’s code is unclear, skip the guesswork rather than mixing cleaners or trying a homemade solution.

4. Apply a fabric-safe sanitizer when it is appropriate

Once the fabric is clean, apply a sanitizer or disinfectant only if it is approved for that upholstery type. Test it in an inconspicuous spot and check for fading, stiffness, color transfer, or a visible ring after it dries.

Mist the fabric evenly rather than drenching it. Follow the label for the required contact time, then allow the chair to air dry completely. Do not cover the chair, replace cushions tightly, or sit on it while it is still damp.

5. Dry the chair fast and completely

Drying is the step many people rush, and it is especially important in South Florida. Run ceiling fans, use air conditioning, open interior airflow where weather allows, and position portable fans nearby. A dehumidifier can help when the room feels damp.

Avoid high heat from a hair dryer, which can damage fibers or set certain stains. Depending on the fabric, cushion thickness, and indoor humidity, drying may take several hours or longer. If the chair still smells musty after it dries, moisture or contamination may remain below the surface.

Cleaning Methods to Avoid

Some popular DIY shortcuts create more work than they solve. Steam can be useful on certain durable fabrics, but it is not universally safe and can cause shrinkage, water marks, or adhesive failure in delicate upholstery. Steam also drives moisture into cushioning if used too heavily.

Bleach is not a fabric sanitizer for upholstered chairs. It can discolor fabric, weaken fibers, and leave irritating residue. Vinegar may help with some mild odors, but it is not a registered disinfectant and can affect dyes or finishes. Mixing cleaning products is never safe, particularly products containing bleach, ammonia, or alcohol.

Heavy fragrance sprays are another temporary fix. They may cover an odor for a few hours without removing the oils, pet residue, or moisture causing it. If the smell returns after the chair dries, the source needs deeper attention.

When Professional Upholstery Cleaning Is the Better Choice

A home method works well for routine maintenance and a fresh, minor spill on a fabric you understand. It is less reliable when the chair has widespread discoloration, strong pet odor, old food or drink stains, mold concerns, smoke residue, or heavily soiled cushions.

Professional upholstery cleaning is also the smart call for valuable dining chairs, antique pieces, delicate natural fibers, and commercial seating with regular guest or employee use. A trained technician can identify the material, choose a compatible method, control moisture, and extract soil that a surface spray cannot reach.

For homes, condos, offices, and common areas across Palm Beach County, The Cleaners Drones can help with professional upholstery cleaning when chairs need more than a quick refresh. The right treatment should improve the visible appearance without leaving the fabric overwet, sticky, or stiff.

Keep Chairs Fresher Between Deep Cleanings

A simple maintenance routine makes sanitizing easier and helps chairs last longer. Vacuum upholstered dining chairs every few weeks, clean spills promptly, and rotate removable cushions when the design allows. Keep chairs out of direct sun where possible, since heat and UV exposure can fade fabric and make stains more noticeable.

If pets use the chairs, place a washable throw over their favorite spot rather than relying on frequent chemical treatments. In busy households and condo common areas, a fabric protector applied after professional cleaning can make future spill cleanup more manageable. It is not a substitute for cleaning, but it can slow absorption and reduce permanent staining.

Clean upholstery should feel dry, smell neutral, and look evenly refreshed, not perfumed or saturated. When you are unsure about the fabric or the source of an odor, protect the chair first: stop adding products, promote airflow, and have the material assessed before a small problem becomes permanent damage.

Mold Prevention for South Florida Properties

A musty smell in a closet, a dark mark near an AC vent, or mildew returning to a shower wall is rarely just a cleaning issue in South Florida. It is usually a moisture issue. Effective mold prevention starts by controlling the humidity, leaks, and damp materials that give mold a place to grow – before a small concern turns into damaged drywall, stained finishes, resident complaints, or a costly restoration project.

Palm Beach County properties face a challenging combination: long humid seasons, wind-driven rain, intense storms, air conditioning running for much of the year, and exterior surfaces that stay damp after a passing shower. The good news is that prevention is practical. It requires consistent attention to water, airflow, cleaning, and the specific weak points of your home or building.

Why mold finds South Florida properties so easily

Mold spores are naturally present indoors and outdoors. The goal is not to create a completely spore-free property. The goal is to keep conditions dry enough that spores cannot settle in and multiply on materials such as drywall, wood, carpet backing, upholstery, ceiling tiles, insulation, and dust.

Humidity is the main reason a clean-looking property can still develop mold. When indoor humidity remains high, condensation can form around supply vents, windows, cold pipes, and exterior-facing walls. That moisture may be subtle, but it can be enough to support growth in a closet, behind furniture, or inside an HVAC area where it is not noticed right away.

Water intrusion creates a more urgent risk. A roof leak, plumbing leak, overflowing appliance, storm-related opening, or wet carpet can lead to mold growth in as little as 24 to 48 hours under the right conditions. The trade-off is simple: routine maintenance takes time, but delayed drying can turn a manageable repair into a larger restoration project.

Mold prevention begins with moisture control

For homeowners, condo associations, and property managers, humidity control should be part of normal property care. Aim to keep indoor relative humidity below 60%, with a range closer to 30% to 50% when possible. A simple digital humidity monitor can reveal whether a room, unit, storage area, or office is staying too damp.

Your air conditioning system does more than cool the air. It also removes moisture. If rooms feel clammy even when the thermostat is set correctly, the system may need attention. Dirty filters, blocked condensate lines, an oversized unit that short-cycles, or poor return airflow can all reduce dehumidification. Have HVAC equipment serviced on schedule, replace filters as recommended, and make sure condensate drains are clear and properly routed.

Bathrooms, laundry rooms, kitchens, and enclosed closets need extra attention. Run exhaust fans during showers and for a period afterward. Use kitchen ventilation when cooking. Avoid packing closets so tightly that air cannot move around walls and stored belongings. If a closet has a persistent musty odor, do not cover it with fragrance. Check for damp walls, exterior leaks, condensation, or items put away before they were fully dry.

Address leaks on the day you find them

A slow leak beneath a sink or behind a refrigerator can be more damaging than an obvious plumbing emergency because it may continue unnoticed for weeks. Check plumbing connections, appliance hoses, water heater areas, and under-sink cabinets regularly. Property managers should also make reporting water issues easy for tenants and residents. Small leaks reported early are usually far easier to dry and repair.

After heavy rain, inspect ceilings, window frames, exterior doors, and wall areas around known roof or façade concerns. In multi-story buildings, water can travel away from the original point of entry, so the visible stain is not always the source. Prompt evaluation matters, especially after a storm.

Dry water damage fast and completely

The first 24 to 48 hours after a leak, flood, or storm intrusion are critical. Remove standing water, protect furniture and belongings, and begin drying affected materials immediately. Fans and dehumidifiers can help with minor, contained incidents, but they are not a substitute for proper moisture assessment when water has reached carpet padding, drywall, baseboards, cabinets, or structural materials.

A surface can feel dry while moisture remains trapped behind it. That is why professional water damage service uses moisture detection, controlled drying equipment, and documentation to determine whether materials are actually dry. This is particularly valuable for condominiums and commercial properties, where a leak in one unit or suite can affect neighboring spaces.

Do not assume that bleach is the answer to every mold concern. On nonporous surfaces, appropriate cleaning may remove visible growth. On porous materials or large affected areas, simply wiping the surface can leave contamination and moisture behind. The right response depends on the material, the size of the affected area, the source of water, and whether the moisture problem has been corrected.

Keep bathrooms, kitchens, and floors from holding moisture

Regular cleaning supports mold prevention because it removes the soap residue, body oils, food debris, and dust that can help mildew and mold establish themselves. Focus on areas that stay wet or receive limited airflow, including shower corners, grout lines, caulk, tub surrounds, sink cabinets, refrigerator drip areas, and flooring near exterior doors.

Grout deserves special attention. It is porous, and damaged or missing grout and caulk allow water to reach areas behind tile. If grout stays dark, crumbles, or repeatedly develops mildew despite cleaning, it may need restoration rather than another round of household cleaner. Restored grout and properly maintained sealant improve appearance, but they also help reduce the places where moisture can collect.

Carpet, area rugs, and upholstery should never remain wet after a spill, leak, or cleaning. Professional cleaning can refresh these materials and remove embedded soil, but drying time matters. Keep air conditioning running, improve ventilation where appropriate, and avoid placing damp rugs back on floors. If carpet padding was saturated by contaminated water or stayed wet for an extended period, replacement may be the safer choice.

Exterior maintenance protects the interior

Mold prevention is not only an indoor task. South Florida’s humidity, rain, and shade can leave exterior walls, roofs, walkways, patios, gutters, and window areas coated with organic growth. Mildew and algae on exterior surfaces may not always indicate an indoor mold issue, but they signal a moisture-friendly environment and can contribute to staining, slippery walkways, blocked drainage, and neglected building envelopes.

Keep gutters, drains, downspouts, and roof drainage paths clear so water moves away from the structure. Trim vegetation that presses against walls or blocks airflow. Inspect caulking around windows and doors, and watch for peeling paint, cracking sealant, or staining around openings.

For multi-story buildings, exterior cleaning and inspection can be difficult when access requires lifts, scaffolding, or disruptive work zones. Drone-powered, low-pressure exterior cleaning gives property teams a practical way to maintain hard-to-reach surfaces while reducing access-related disruption. The Cleaners Drones uses this approach for high-rise and multi-story properties where safer access and visible results both matter.

A practical inspection routine for homes and buildings

Prevention works best when it is routine rather than reactive. Each month, look under sinks, around toilets, near water heaters, and at AC closets or air handlers. Check for condensation, dampness, discoloration, loose flooring, bubbling paint, or odors that return after cleaning.

After major rain events, inspect the roofline, ceilings, windows, exterior doors, and common areas. For HOAs and commercial properties, document recurring water issues by location and date. Patterns can reveal a drainage, roof, plumbing, or HVAC problem that one-off cleaning will not solve.

Pay attention to resident or employee reports as well. A complaint about a musty odor, damp carpet, or recurring bathroom mildew is useful information, not a minor inconvenience. Early investigation protects indoor conditions and helps avoid more disruptive work later.

When to call for professional help

Call for professional assessment when water has affected more than a small, easily dried area; when visible mold keeps returning; when odors persist; or when the source of moisture is unclear. You should also act quickly after roof leaks, burst pipes, appliance overflows, sewage backups, or storm water intrusion.

For property managers and HOA boards, fast response protects more than finishes. It supports resident confidence, reduces the chance of damage spreading between units, and creates a clearer record of what happened and how it was addressed. The right team can help identify moisture, dry affected areas, clean appropriate surfaces, and recommend the next step based on the actual condition of the property.

A dry, well-maintained property is easier to clean, healthier to occupy, and more resilient when South Florida weather puts it to the test. Start with the next damp corner, slow drain, or musty closet you notice – small corrections made early can protect the spaces people rely on every day.

Does Steam Cleaning Shrink Upholstery? What to Know

A sofa can look dramatically better after a deep clean, but no homeowner wants that improvement to come with tighter cushions, puckered seams, or distorted fabric. So, does steam cleaning shrink upholstery? It can, but only under certain conditions. The real risk comes from using too much heat, too much moisture, or the wrong cleaning method for the fabric.

Professional upholstery cleaning is not a one-setting process. A qualified technician identifies the fiber type, checks the manufacturer’s cleaning code, tests a hidden area, and controls heat and drying time. That approach helps remove soil, odors, and stains while protecting the fit, feel, and appearance of the furniture.

Does Steam Cleaning Shrink Upholstery?

Natural fibers are the most likely to shrink when exposed to high heat or excessive water. Cotton, linen, rayon, silk, wool, and some blends can tighten, wrinkle, lose shape, or develop water marks if they are cleaned aggressively. Even a durable-looking couch may have a delicate face fabric, cotton backing, or glued components underneath the upholstery.

Synthetic materials such as polyester, olefin, acrylic, and many microfiber fabrics are generally more stable. Still, that does not mean they are safe for unlimited heat. Hot steam can affect certain finishes, cause pile distortion, set some stains, or loosen adhesives used in cushions and trim.

The word “steam cleaning” also creates confusion. Many people use it to describe any machine that sprays hot water and extracts it. True vapor steam is very hot and contains relatively little water. Hot-water extraction uses warm cleaning solution, agitation, and powerful recovery equipment. Both methods can be effective, but neither is appropriate for every piece of upholstery.

What Actually Causes Upholstery to Shrink

Shrinkage usually happens when moisture and heat change the structure of a natural fiber. Fabric that becomes saturated may contract as it dries, especially if it dries unevenly or too quickly under intense heat. That is why a do-it-yourself rental machine, household steamer, or handheld tool can create problems when used without fabric-specific guidance.

Several other factors can make the risk higher:

  • Fabric construction: Loose weaves, unpreshrunk cotton, rayon blends, and delicate natural fibers require more controlled cleaning.
  • Cushion design: Removable covers may shrink around the foam or become difficult to reinstall after washing.
  • Hidden materials: Cotton or jute backing, foam, cardboard supports, and adhesives can react badly to overwetting.
  • Previous wear: Older furniture, sun-faded fabric, weakened seams, and prior spot treatments may be less stable than they appear.
  • Drying conditions: South Florida humidity can slow drying. When furniture stays damp too long, it may develop odor, browning, dye migration, or mildew concerns.

A common issue is not full shrinkage of the entire sofa. Instead, homeowners may see ripples, pulled seams, stiff spots, cushion cover distortion, or a skirt that no longer hangs evenly. These changes are often difficult, and sometimes impossible, to reverse.

Read the Upholstery Cleaning Code Before Using Heat

Most upholstered furniture has a care tag under a cushion, beneath the frame, or attached to the underside. The tag may list a cleaning code that provides a useful starting point.

W means water-based cleaning methods are typically permitted. S means use a solvent-based cleaner only. WS or SW means either water- or solvent-based methods may be suitable. X means vacuuming or professional cleaning only, with no water- or solvent-based spot cleaning recommended at home.

These codes matter, but they are not a complete cleaning plan. A W-coded sofa may still need low moisture, moderate temperature, and careful drying. A fabric’s colorfastness, texture, backing, and condition all affect the safest method.

If you cannot find the tag, do not assume the furniture is washable. This is especially true for custom pieces, vintage furniture, imported upholstery, velvet, silk, wool, and furniture with down-filled cushions.

Fabrics That Need Extra Caution

Rayon is one of the more challenging upholstery fibers because it can brown, shrink, and lose texture easily. Cotton and linen can also shrink or develop water rings. Wool can felt or change texture when exposed to heat and agitation. Silk should not be treated with ordinary steam-cleaning equipment.

Velvet deserves special attention as well. Whether it is cotton, polyester, or a blend, excessive heat or brushing can crush the pile and leave permanent shading. Leather is not upholstery fabric in the usual sense, but it also should not be steam-cleaned like a cloth sofa. It needs a leather-specific cleaning and conditioning process.

Microfiber often responds well to professional cleaning, but there are exceptions. Some microfiber is water-safe; other types require solvent-based products. Applying water to an S-coded microfiber couch can leave dark rings or stiff patches.

How Professionals Clean Upholstery Without Overwetting It

Safe upholstery cleaning starts with inspection, not a machine. A technician should check the care code, identify likely fibers, inspect stains, and look for fading, weakened seams, pet damage, ink, dye transfer, or previous cleaning residue. A small test in an inconspicuous area helps confirm that the color and texture remain stable.

From there, the method is matched to the piece. Some furniture benefits from low-moisture hot-water extraction with fast recovery. Others need dry foam, solvent cleaning, encapsulation, or detail hand-cleaning. The goal is not to apply the most heat or water. The goal is to remove embedded soil while leaving the fabric only lightly damp.

Drying is part of the service, not an afterthought. Professional extraction equipment removes more moisture than consumer machines, and air movement can be used to speed dry time. In Palm Beach County and throughout South Florida, managing indoor humidity is especially helpful. Air conditioning, ceiling fans, and proper airflow can help upholstery dry evenly and reduce the chance of lingering odors.

When Steam Cleaning Is the Wrong Choice

Steam cleaning is not the right answer when the upholstery code prohibits water, when the fabric is unstable, or when a stain requires specialized chemistry rather than heat. Protein stains, such as blood, dairy, or some pet accidents, can become more difficult to remove if high heat is applied first. Heat can also permanently set certain dyes and make some spills spread.

Furniture with severe urine contamination may need more than surface cleaning. Odor treatment has to reach the affected padding and underlying materials without soaking the entire piece. Similarly, smoke odor, mold concerns, water damage, and heavily stained vintage upholstery require a careful assessment before any cleaning begins.

A professional may recommend against cleaning when the fabric is too fragile or the risk of damage outweighs the likely improvement. That is not a lack of effort. It is an honest recommendation designed to protect an expensive piece of furniture.

Smart Steps Before You Clean a Sofa at Home

For light maintenance, vacuum upholstery regularly using a brush or upholstery attachment. This removes dry soil before it works deeper into the fabric. Address fresh spills by blotting gently with a clean white towel. Avoid rubbing, which can spread the stain and damage fibers.

Do not saturate a spot with store-bought cleaner, and do not use a garment steamer as a substitute for upholstery equipment. Test any product in a hidden area first, then allow that area to dry completely before treating a visible section. If a stain remains after one careful attempt, repeated applications often create more risk than benefit.

Protect the Furniture You Use Every Day

A professionally applied fabric protector can help upholstered furniture resist everyday spills and make future maintenance easier. It is particularly useful for family rooms, dining chairs, pet-friendly homes, rental properties, and high-use condo furnishings. Protection does not make fabric stain-proof, but it gives you more time to blot a spill before it penetrates the fibers.

For furniture that needs a deeper refresh, The Cleaners Drones uses material-appropriate methods designed to deliver visible results without treating every fabric the same way. The safest clean is the one tailored to your upholstery, its condition, and the kind of use it sees every day.

Before putting heat, water, or a rental machine on a favorite sofa, check the care label and consider the fabric behind the visible surface. A careful assessment can preserve both the clean look you want and the furniture you paid for.